半天学会使用xml文件创建虚拟机以及制作模版机
一、准备网络环境
网络桥接,配置br0网卡
[root@node1 network-scripts]# cat ifcfg-eth0
NAME="eth0"
ONBOOT=yes
BOOTPROTO=static
TYPE=Ethernet
BRIDGE=br0
DNS1=114.114.114.114
[root@node1 network-scripts]# cat ifcfg-br0
NAME="br0"
DEVICE=br0
ONBOOT=yes
BOOTPROTO=static
TYPE=Bridge
IPADDR=172.18.4.15
NETMASK=255.255.0.0
GATEWAY=172.18.0.1
DNS1=114.114.114.114
[root@node1 network-scripts]# systemctl restart network
二、安装软件
qemu-kvm is an open source virtualizer that provides hardware emulation for the KVM hypervisor.安装qemu-kvm会安装一些依赖,比如qemu-img,用于管理磁盘镜像的。
Libvirt提供了一些专门管理qemu虚拟机的工具,让管理虚拟机更简单
[root@node1 ~]# yum install qemu-kvm libvirt -y
三、启动libvirtd服务
[root@node1 ~]# systemctl start libvirtd && systemctl enable libvirtd
四、准备镜像
[root@node1 ~]# mkdir /data/{iso,centos7} -p
[root@node1 ~]# (cd /data/iso/;wget https://mirrors.huaweicloud.com/centos/7/isos/x86_64/CentOS-7-x86_64-Minimal-1908.iso)
五、准备一个磁盘
[root@node1 ~]# qemu-img create -f qcow2 /data/centos7/centos7-1.qcow2 50G
六、准备xml文件
需要改的地方:name,memory,currentMemory,vcpu,source file(磁盘位置,镜像那也可以改下),mac address(不要随机生成,改几位就行)
http://www.atoolbox.net/Tool.php?Id=807
centos7最好给2g内存安装,以免发生意外。安装好后可以改为512都没问题
<domain type='kvm'>
  <name>centos7-1</name>
  <memory unit='GiB'>1</memory>
  <currentMemory unit='GiB'>1</currentMemory>
  <vcpu placement='static'>1</vcpu>
  <sysinfo type='smbios'>
    <system>
      <entry name='manufacturer'>test</entry>
    </system>
  </sysinfo>
  <os>
    <type arch='x86_64' machine='pc'>hvm</type>
    <boot dev='hd'/>
    <bootmenu enable='yes'/>
    <smbios mode='sysinfo'/>
  </os>
  <features>
    <acpi/>
    <apic/>
    <pae/>
  </features>
  <clock offset='utc'/>
  <on_poweroff>destroy</on_poweroff>
  <on_reboot>restart</on_reboot>
  <on_crash>destroy</on_crash>
  <devices>
    <emulator>/usr/libexec/qemu-kvm</emulator>
    <disk type='file' device='disk'>
      <driver name='qemu' type='qcow2' cache='writeback'/>
      <source file='/data/centos7/centos7-1.qcow2'/>
      <target dev='vda' bus='virtio'/>
    </disk>
    <disk type='file' device='cdrom'>
      <driver name='qemu' type='raw'/>
      <source file='/data/iso/CentOS-7-x86_64-Minimal-1908.iso'/>
      <target dev='hdb' bus='ide'/>
    <readonly/>
    </disk>
    <controller type='virtio-serial' index='0'>
    </controller>
    <controller type='usb' index='0' model='piix3-uhci'>
    </controller>
    <controller type='pci' index='0' model='pci-root'/>
    <serial type='pty'>
      <target type='isa-serial' port='0'>
        <model name='isa-serial'/>
      </target>
    </serial>
    <interface type='bridge'>
      <mac address='00:40:8A:34:89:F7'/>
      <source bridge='br0'/>
      <target dev='vnet0'/>
      <model type='virtio'/>
      <alias name='net0'/>
      <address type='pci' domain='0x0000' bus='0x00' slot='0x03' function='0x0'/>
    </interface>
    <console type='pty'>
      <target type='serial' port='0'/>
    </console>
    <input type='tablet' bus='usb'>
    </input>
    <input type='mouse' bus='ps2'/>
    <input type='keyboard' bus='ps2'/>
    <graphics type='vnc' port='-1' autoport='yes' listen='0.0.0.0'>
    </graphics>
    <video>
      <model type='cirrus' vram='16384' heads='1' primary='yes'/>
    </video>
    <memballoon model='virtio'>
      <stats period='10'/>
    </memballoon>
  </devices>
</domain>
七、使用virsh define渲染
[root@node1 ~]# virsh define centos7-1.xml
八、启动虚拟机
[root@node1 ~]# virsh list --all
 Id    Name                           State
----------------------------------------------------
 -     centos7-1                      shut off
[root@node1 ~]# virsh start centos7-1
Domain centos7-1 started
[root@node1 ~]# virsh list --all
 Id    Name                           State
----------------------------------------------------
 1     centos7-1                      running
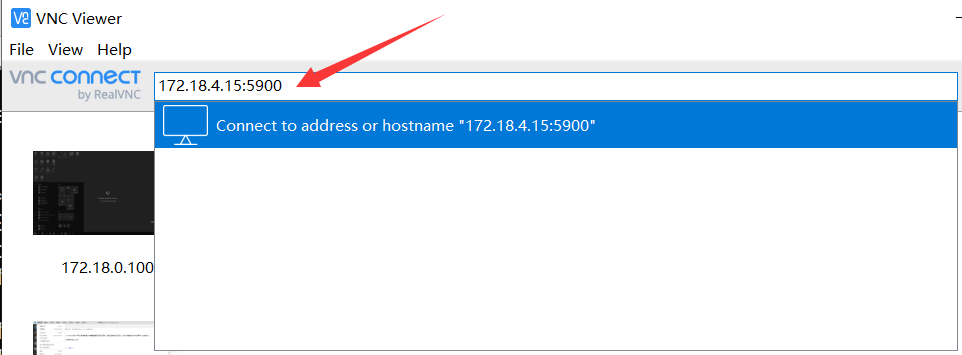
九、vnc viewer连
https://www.realvnc.com/download/file/viewer.files/VNC-Viewer-6.19.1115-Windows-64bit.exe
[root@node1 ~]# virsh vncdisplay centos7
:0
[root@node1 ~]# ss -ltn | grep :59
LISTEN     0      1            *:5900                     *:*
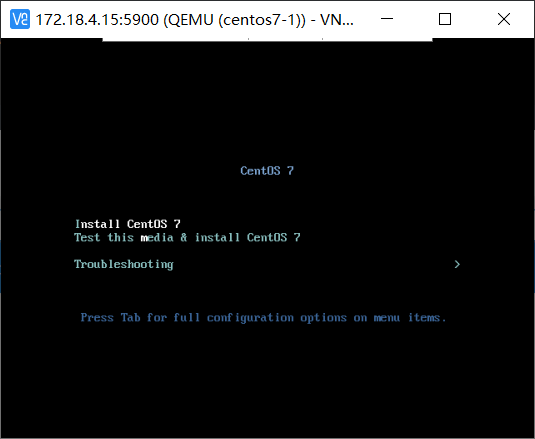
 可以使用vnc发送ctrl+alt+delete,然后esc,然后选cdrom进入
十、拓展,将该虚拟机作为模版机
1、对虚拟机做下面操作
#!/bin/bash
#set -e
RED="\033[0;31m"
GREEN="\033[0;32m"
NO_COLOR="\033[0m"

# 修改别名
modify_alias() {
cat >> ~/.bashrc <<EOF
alias cdnet='cd /etc/sysconfig/network-scripts/'
alias editnet='vim /etc/sysconfig/network-scripts/ifcfg-ens33'
alias rm='rm -i'
alias scandisk="echo ' - - - ' > /sys/class/scsi_host/host0/scan;echo ' - - - ' > /sys/class/scsi_host/host1/scan;echo ' - - - ' > /sys/class/scsi_host/host2/scan"
EOF
}

# 修改命令提示符
modify_PS1() {
    echo 'PS1="\[\e[1;34m\][\u@\h \W]\\$\[\e[0m\] "' >> /etc/profile.d/env.sh
}

# 安装基本软件
install_software() {
    yum install   gcc gcc-c++ glibc glibc-devel pcre pcre-devel openssl  openssl-devel systemd-devel zlib-devel  vim lrzsz tree screen  lsof tcpdump wget  ntpdate net-tools iotop bc  zip unzip nfs-utils -y
}

# 替换yum源
replace_yum() {
    curl -o /etc/yum.repos.d/CentOS-Base.repo http://mirrors.aliyun.com/repo/Centos-7.repo
    sed -i -e '/mirrors.cloud.aliyuncs.com/d' -e '/mirrors.aliyuncs.com/d' /etc/yum.repos.d/CentOS-Base.repo
    curl -o /etc/yum.repos.d/epel.repo http://mirrors.aliyun.com/repo/epel-7.repo
    yum makecache
}

# vimrc复制过来
modify_vimrc() {
cat > ~/.vimrc <<EOF
set ignorecase
set cursorline
set autoindent
set ai
autocmd BufNewFile *.sh exec ":call SetTitle()"

func SetTitle()
        if expand("%:e") == 'sh'
        call setline(1,"#!/bin/bash")
        call setline(2,"#**************************************************************")
        call setline(3,"#Author:                     Linus")
        call setline(4,"#QQ:                         599503252")
        call setline(5,"#Date:                       ".strftime("%Y-%m-%d"))
        call setline(6,"#FileName:                   ".expand("%"))
        call setline(7,"#URL:                        https://blog.51cto.com/14012942")
        call setline(8,"#Description:                Initialize the new server")
        call setline(9,"#Copyright (C):              ".strftime("%Y")." Copyright ©  站点名称  版权所有")
        call setline(10,"#************************************************************")
        call setline(11,"")
        endif
endfunc
autocmd BufNewFile * normal G
EOF
}

# 关闭selinux和firewalld
iptables_selinux_stop() {
    sed -i 's/SELINUX=enforcing/SELINUX=disabled/g' /etc/selinux/config
    setenforce 0

    systemctl stop firewalld
    systemctl disable firewalld
}

# 判断是不是root
judge_root() {
    [ $(id -u) != "0" ] && { echo -e "${RED}Error:${NO_COLOR} You must be root to run this script."; exit 1; }
}

# 判断是不是CentOS7
Check_release() {
    if [ -f /etc/redhat-release ];then
        release="centos"
        version=`sed -r 's/.* ([0-9]+)\..*/\1/' /etc/redhat-release`
    if [ "$version" = "7" ];then
        echo "Current release: CentOS7."
    else {
        echo -e "[${RED}Error${NO_COLOR}] This script can only be running on CentOS7."
        exit 1
    }
    fi
    else {
        echo -e "[${RED}Error${NO_COLOR}] This script can only be running on CentOS7."
    exit 1
    }
    fi
}

########################时区调整########################
timezone_adjust(){
    ln -sf  /usr/share/zoneinfo/Asia/Shanghai /etc/localtime
}

#修改网卡为eth0
modify_eth_card() {
   ip a | grep -q eth0
   if [ "$?" -eq 1 ];then
       sed -ri '/^GRUB_CMDLINE/s/(.*)"/\1 net.ifnames=0"/' /etc/default/grub
       grub2-mkconfig -o /boot/grub2/grub.cfg
   fi
   rm -f /etc/sysconfig/network-scripts/ifcfg-ens33
   cat > /etc/sysconfig/network-scripts/ifcfg-eth0 <<EOF
NAME="eth0"
ONBOOT=yes
BOOTPROTO=dhcp
TYPE=Ethernet
DEFROUTE=yes
DNS1=114.114.114.114
EOF
}

#自动补全
bash_completion() {
    yum install bash-completion -y
    source /usr/share/bash-completion/bash_completion
}

#时间同步
time_sync(){
    yum install chrony -y
    sed '/^server/s/^/#/' /etc/chrony.conf -i
    sed '1a server ntp.aliyun.com iburst' /etc/chrony.conf -i
    sed '1a server 0.cn.pool.ntp.org iburst' /etc/chrony.conf -i
    sed '1a server ntp1.aliyun.com iburst' /etc/chrony.conf -i
    systemctl restart chronyd
    systemctl enable chronyd
    echo '*/30 * * * * /usr/sbin/ntpdate ntp.aliyun.com &>/dev/null' >> /var/spool/cron/root
}

#ssh调优
ssh_adjust(){
    cp /etc/ssh/sshd_config{,_bak}
    sed '/^GSSAPIAuthentication/d' /etc/ssh/sshd_config -i
    sed '/^UseDNS/d' /etc/ssh/sshd_config -i
    echo "GSSAPIAuthentication no" >> /etc/ssh/sshd_config
    echo "UseDNS no" >> /etc/ssh/sshd_config
    systemctl restart sshd
}

#最大文件打开数
limits_tune(){
    echo '
*   soft nofile 128000
*   hard nofile 256000

root soft nofile 128000
root hard nofile 256000
' >> /etc/security/limits.conf
}


main() {
    judge_root
    Check_release
    replace_yum
    install_software
    iptables_selinux_stop
    modify_alias
    modify_vimrc
    timezone_adjust
    time_sync
    limits_tune
    ssh_adjust
    modify_PS1
    modify_eth_card
    bash_completion
}

main
2、关机拷贝出来即可
十一、如何使用该模版机创建虚拟机
1、生成一个随机mac
http://www.atoolbox.net/Tool.php?Id=807
00:86:08:2D:28:06
2、模版机放好
[root@node1 ~]# ls -lh /data/centos7/centos7.qcow2
-rw-r--r-- 1 root root 1.9G Nov 19 16:47 /data/centos7/centos7.qcow2
3、编写xml文件
[root@node1 ~]# cat centos7.xml
<domain type='kvm'>
  <name>centos7</name>
  <memory unit='MiB'>512</memory>
  <currentMemory unit='MiB'>512</currentMemory>
  <vcpu placement='static'>1</vcpu>
  <sysinfo type='smbios'>
    <system>
      <entry name='manufacturer'>test</entry>
    </system>
  </sysinfo>
  <os>
    <type arch='x86_64' machine='pc'>hvm</type>
    <boot dev='hd'/>
    <bootmenu enable='yes'/>
    <smbios mode='sysinfo'/>
  </os>
  <features>
    <acpi/>
    <apic/>
    <pae/>
  </features>
  <clock offset='utc'/>
  <on_poweroff>destroy</on_poweroff>
  <on_reboot>restart</on_reboot>
  <on_crash>destroy</on_crash>
  <devices>
    <emulator>/usr/libexec/qemu-kvm</emulator>
    <disk type='file' device='disk'>
      <driver name='qemu' type='qcow2' cache='writeback'/>
      <source file='/data/centos7/centos7.qcow2'/>
      <target dev='vda' bus='virtio'/>
    </disk>
    <controller type='virtio-serial' index='0'>
    </controller>
    <controller type='usb' index='0' model='piix3-uhci'>
    </controller>
    <controller type='pci' index='0' model='pci-root'/>
    <serial type='pty'>
      <target type='isa-serial' port='0'>
        <model name='isa-serial'/>
      </target>
    </serial>
    <interface type='bridge'>
      <mac address='00:86:08:2D:28:06'/>
      <source bridge='br0'/>
      <target dev='vnet0'/>
      <model type='virtio'/>
      <alias name='net0'/>
      <address type='pci' domain='0x0000' bus='0x00' slot='0x03' function='0x0'/>
    </interface>
    <console type='pty'>
      <target type='serial' port='0'/>
    </console>
    <input type='tablet' bus='usb'>
    </input>
    <input type='mouse' bus='ps2'/>
    <input type='keyboard' bus='ps2'/>
    <graphics type='vnc' port='-1' autoport='yes' listen='0.0.0.0'>
    </graphics>
    <video>
      <model type='cirrus' vram='16384' heads='1' primary='yes'/>
    </video>
    <memballoon model='virtio'>
      <stats period='10'/>
    </memballoon>
  </devices>
</domain>
4、使用virsh define渲染
[root@node1 ~]# virsh define centos7.xml
5、启动虚拟机
[root@node1 ~]# virsh start centos7
6、使用脚本查看虚拟机IP
[root@node1 ~]# cat ip.sh
#!/bin/bash
#BY MRCO,2015-06-10
subnet=172.18.4

for ip in $subnet.{1..253};do
{
    ping -c1 $ip >/dev/null 2>&1
}&
done

running_vms=`virsh list |grep running`
echo -ne "共有`echo "$running_vms"|wc -l`个虚拟机在运行.\n"

for i in `echo "$running_vms" | awk '{ print $2 }'`;do
    mac=`virsh dumpxml $i |grep "mac address"|sed "s/.*'\(.*\)'.*/\1/g"`
    ip=`ip nei |grep "$mac" |awk '{printf $1}'`
    printf "%-30s %-30s\n" $i $ip
done
[root@node1 ~]# bash ip.sh
共有1个虚拟机在运行.
centos7                        172.18.4.17
7、连接虚拟机测试
内存,mac地址,ip地址,都没毛病
[root@localhost ~]# free -h
              total        used        free      shared  buff/cache   available
Mem:           487M         69M        330M        4.4M         86M        400M
Swap:          2.0G          0B        2.0G
[root@localhost ~]# ip addr show eth0
2: eth0: <BROADCAST,MULTICAST,UP,LOWER_UP> mtu 1500 qdisc pfifo_fast state UP group default qlen 1000
    link/ether 00:86:08:2d:28:06 brd ff:ff:ff:ff:ff:ff
    inet 172.18.4.17/16 brd 172.18.255.255 scope global noprefixroute dynamic eth0
       valid_lft 2591856sec preferred_lft 2591856sec
    inet6 fe80::286:8ff:fe2d:2806/64 scope link
       valid_lft forever preferred_lft forever
8、如果磁盘不够
虚拟机关机后,使用qemu-img resize /data/centos7/centos7.qcow2 +50G扩容,然后启动虚拟机
9、如果内存不够
关机后使用virsh setmaxmem centos7 4G设置虚拟机最大内存,然后开机后使用virsh setmem centos7 4G设置虚拟机内存即可
十二、额外知识
1、kvm进程
[root@node1 ~]# ps -ef | grep qemu-kvm
qemu      20400      1  8 16:58 ?        00:00:24 /usr/libexec/qemu-kvm -name centos7 -S -machine pc-i440fx-rhel7.0.0,accel=kvm,usb=off,dump-guest-core=off -m 512 -realtime mlock=off -smp 1,sockets=1,cores=1,threads=1 -uuid 8be05b27-019d-430a-b090-2eeae000da67 -smbios type=1,manufacturer=test -no-user-config -nodefaults -chardev socket,id=charmonitor,path=/var/lib/libvirt/qemu/domain-2-centos7/monitor.sock,server,nowait -mon chardev=charmonitor,id=monitor,mode=control -rtc base=utc -no-shutdown -boot menu=on,strict=on -device piix3-usb-uhci,id=usb,bus=pci.0,addr=0x1.0x2 -device virtio-serial-pci,id=virtio-serial0,bus=pci.0,addr=0x4 -drive file=/data/centos7/centos7.qcow2,format=qcow2,if=none,id=drive-virtio-disk0,cache=writeback -device virtio-blk-pci,scsi=off,bus=pci.0,addr=0x5,drive=drive-virtio-disk0,id=virtio-disk0,bootindex=1 -netdev tap,fd=26,id=hostnet0,vhost=on,vhostfd=28 -device virtio-net-pci,netdev=hostnet0,id=net0,mac=00:86:08:2d:28:06,bus=pci.0,addr=0x3 -chardev pty,id=charserial0 -device isa-serial,chardev=charserial0,id=serial0 -device usb-tablet,id=input0,bus=usb.0,port=1 -vnc 0.0.0.0:0 -vga cirrus -device virtio-balloon-pci,id=balloon0,bus=pci.0,addr=0x6 -msg timestamp=on
root      21578  17048  0 17:03 pts/0    00:00:00 grep --color=auto qemu-kvm
2、如果virsh start报错,
可以手动virsh edit centos7来编辑xml文件,看哪里错了,然后改
3、可以删除libvirt默认的网络,不用它
[root@node1 ~]# virsh net-undefine default
[root@node1 ~]# virsh net-autostart --disable default
[root@node1 ~]# virsh net-destroy default
#经测试,上面三条命令够了
[root@node1 ~]# ip link set virbr0-nic down
[root@node1 ~]# ip link delete virbr0-nic
[root@node1 ~]# ip link delete virbr0
4、以下操作需要慢慢查询学习(大佬的系统优化吧还是啥,很少操作这些模块)
modprobe -r xt_nat
modprobe -r xt_CHECKSUM
modprobe -r iptable_mangle
modprobe -r ipt_MASQUERADE
modprobe -r nf_conntrack_ipv4
modprobe -r nf_defrag_ipv4
modprobe -r xt_conntrack
modprobe -r ipt_REJECT
modprobe -r xt_NOTRACK
modprobe -r nf_conntrack_netbios_ns
modprobe -r xt_state
modprobe -r nf_nat_masquerade_ipv4
modprobe -r ip_tables
modprobe -r ip_filter
iptables-save
systemctl status firewalld
systemctl status iptables
systemctl status ebtables
/usr/libexec/ebtables stop
/usr/libexec/iptables/ip6tables.init stop
/usr/libexec/iptables/iptables.init stop
modprobe -r xt_nat
modprobe -r xt_CHECKSUM
modprobe -r iptable_mangle
modprobe -r ipt_MASQUERADE
modprobe -r nf_conntrack_ipv4
modprobe -r nf_defrag_ipv4
modprobe -r xt_conntrack
modprobe -r ipt_REJECT
modprobe -r xt_NOTRACK
modprobe -r nf_conntrack
modprobe -r nf_nat
modprobe -r nf_nat_masquerade_ipv4
modprobe -r ip_tables
modprobe -r ip_filter
cat /etc/sysctl.conf
sysctl -a | grep -i ip_forward
/usr/libexec/ebtables stop
/usr/libexec/iptables/ip6tables.init stop
/usr/libexec/iptables/iptables.init stop
modprobe -r xt_nat
modprobe -r xt_CHECKSUM
modprobe -r iptable_mangle
modprobe -r ipt_MASQUERADE
modprobe -r nf_conntrack_ipv4
modprobe -r nf_defrag_ipv4
modprobe -r xt_conntrack
modprobe -r ipt_REJECT
modprobe -r xt_NOTRACK
modprobe -r nf_conntrack_netbios_ns
modprobe -r xt_state
modprobe -r nf_conntrack
modprobe -r nf_nat
modprobe -r nf_nat_masquerade_ipv4
modprobe -r ip_tables
sysctl -a | grep ip_forward
echo 'net.ipv4.ip_forward = 1' >> /etc/sysctl.conf
cat /etc/sysctl.conf
sysctl -p
modprobe -r xt_CHECKSUM
modprobe -r iptable_mangle
modprobe -r ipt_MASQUERADE
modprobe -r nf_conntrack_ipv4
modprobe -r nf_defrag_ipv4
modprobe -r xt_conntrack
modprobe -r ipt_REJECT
modprobe -r xt_NOTRACK
modprobe -r nf_conntrack_netbios_ns
modprobe -r xt_state
modprobe -r nf_conntrack
modprobe -r nf_nat
modprobe -r nf_nat_masquerade_ipv4
modprobe -r nf_conntrack_pptp nf_conntrack_proto_gre nf_conntrack_netlink xt_CT nfnetlink nf_conntrack nf_nat ip_set ip_set_hash_net xt_set xt_nat nf_nat nf_conntrack ip_set_hash_net xt_set ip_set
modprobe -r ip_tables
5、关于xml文档的配置(需要时候再看吧)
https://libvirt.org/formatdomain.html
libvirt只是个封装,让你不用去记qemu的命令参数而已,但最好还是了解下,因为排障需要~