kvm实战(二)
一、安装相关软件
yum install qemu-kvm libvirt virt-install -y
二、启动服务
systemctl start libvirtd && systemctl enable libvirtd
三、修改网卡配置
[root@es-2 network-scripts]# cat ifcfg-ens33
# Generated by dracut initrd
NAME="eth0"
ONBOOT=yes
BOOTPROTO=static
TYPE=Ethernet
BRIDGE=br0
DNS1=114.114.114.114
[root@es-2 network-scripts]# cat ifcfg-br0
NAME="br0"
DEVICE=br0
ONBOOT=yes
BOOTPROTO=static
TYPE=Bridge
IPADDR=172.18.3.139
NETMASK=255.255.0.0
GATEWAY=172.18.0.1
DNS1=114.114.114.114
[root@es-2 network-scripts]# systemctl restart network
四、删除默认网卡,网络
virsh net-undefine default
virsh net-autostart --disable default
virsh net-destroy default
ip link set virbr0-nic down
ip link delete virbr0-nic
ip link delete virbr0
五、镜像
mkdir /data/{iso,machine} -p
cd /data/iso/
wget https://mirrors.huaweicloud.com/centos/7/isos/x86_64/CentOS-7-x86_64-Minimal-1908.iso
六、创建磁盘
qemu-img create -f qcow2 /data/machine/centos7-1.qcow2 100G
七、virt-install创建虚拟机
virt-install \
--name centos7-1 \
--memory 1024 \
--vcpus 1 \
--virt-type kvm \
--cdrom /data/iso/CentOS-7-x86_64-Minimal-1908.iso \
--disk /data/machine/centos7-1.qcow2 \
--network bridge=br0 \
--graphics vnc,listen=0.0.0.0 \
--noautoconsole
[root@es-2 ~]# ss -ltn
State      Recv-Q Send-Q                      Local Address:Port                                     Peer Address:Port
LISTEN     0      1                                       *:5900                                                *:*
LISTEN     0      128                                     *:111                                                 *:*
LISTEN     0      128                                     *:22                                                  *:*
LISTEN     0      100                             127.0.0.1:25                                                  *:*
LISTEN     0      128                                    :::111                                                :::*
LISTEN     0      128                                    :::22                                                 :::*
LISTEN     0      100                                   ::1:25                                                 :::*
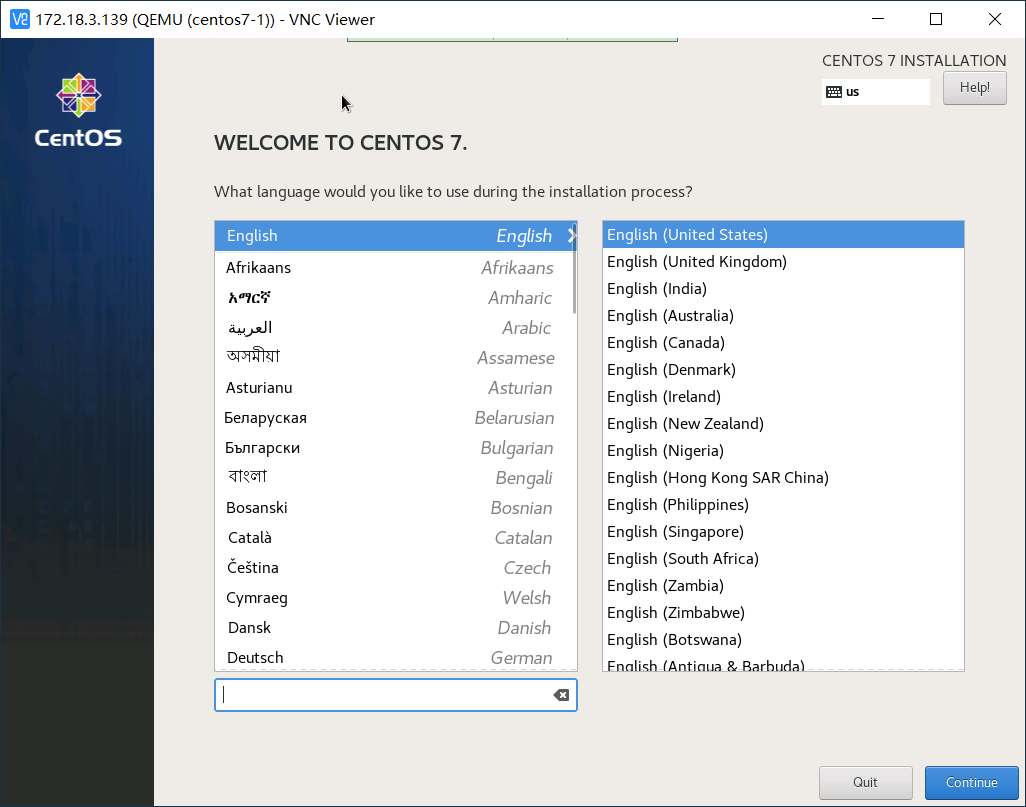
vnc连(这里遇到了一个坑,建议去官网下载vnc viewer连)
八、第一次备份(可以不用)
[root@es-2 machine]# du -sh centos7-1.qcow2
3.1G	centos7-1.qcow2
[root@es-2 machine]# scp centos7-1.qcow2 172.18.4.4:/opt/
九、基本优化
#重新开机
[root@es-2 machine]# virsh start --domain centos7-1
[root@localhost ~]# cat reset4.0-test.sh
#!/bin/bash
#**************************************************************
#Author:                     28
#QQ:                         599503252
#Date:                       2019-08-01
#FileName:                   reset.sh
#URL:                        https://blog.51cto.com/14012942
#Description:                The test script
#Copyright (C):              2019 Copyright ©  站点名称  版权所有
#************************************************************
#set -e
RED="\033[0;31m"
GREEN="\033[0;32m"
NO_COLOR="\033[0m"

# 修改别名
modify_alias() {
cat >> ~/.bashrc <<EOF
alias cdnet='cd /etc/sysconfig/network-scripts/'
alias editnet='vim /etc/sysconfig/network-scripts/ifcfg-ens33'
alias rm='rm -i'
alias scandisk="echo ' - - - ' > /sys/class/scsi_host/host0/scan;echo ' - - - ' > /sys/class/scsi_host/host1/scan;echo ' - - - ' > /sys/class/scsi_host/host2/scan"
EOF
}

# 修改命令提示符
modify_PS1() {
    echo 'PS1="\[\e[1;34m\][\u@\h \W]\\$\[\e[0m\] "' >> /etc/profile.d/env.sh
}

# 安装基本软件
install_software() {
    yum install   gcc gcc-c++ glibc glibc-devel pcre pcre-devel openssl  openssl-devel systemd-devel zlib-devel  vim lrzsz tree screen  lsof tcpdump wget  ntpdate net-tools iotop bc  zip unzip nfs-utils -y
}

# 替换yum源
replace_yum() {
    #wget -O /etc/yum.repos.d/CentOS-Base.repo http://mirrors.aliyun.com/repo/Centos-7.repo
    curl -o /etc/yum.repos.d/CentOS-Base.repo http://mirrors.aliyun.com/repo/Centos-7.repo
    sed -i -e '/mirrors.cloud.aliyuncs.com/d' -e '/mirrors.aliyuncs.com/d' /etc/yum.repos.d/CentOS-Base.repo
    #wget -O /etc/yum.repos.d/epel.repo http://mirrors.aliyun.com/repo/epel-7.repo
    curl -o /etc/yum.repos.d/epel.repo http://mirrors.aliyun.com/repo/epel-7.repo
    yum makecache
}

# vim
# vimrc复制过来
modify_vimrc() {
cat > ~/.vimrc <<EOF
set ignorecase
set cursorline
set autoindent
set ai
autocmd BufNewFile *.sh exec ":call SetTitle()"

func SetTitle()
        if expand("%:e") == 'sh'
        call setline(1,"#!/bin/bash")
        call setline(2,"#**************************************************************")
        call setline(3,"#Author:                     Linus")
        call setline(4,"#QQ:                         599503252")
        call setline(5,"#Date:                       ".strftime("%Y-%m-%d"))
        call setline(6,"#FileName:                   ".expand("%"))
        call setline(7,"#URL:                        https://blog.51cto.com/14012942")
        call setline(8,"#Description:                Initialize the new server")
        call setline(9,"#Copyright (C):              ".strftime("%Y")." Copyright ©  站点名称  版权所有")
        call setline(10,"#************************************************************")
        call setline(11,"")
        endif
endfunc
autocmd BufNewFile * normal G
EOF
}

# 关闭selinux和firewalld
iptables_selinux_stop() {
    sed -i 's/SELINUX=enforcing/SELINUX=disabled/g' /etc/selinux/config
    setenforce 0

    systemctl stop firewalld
    systemctl disable firewalld
}

# 判断是不是root
judge_root() {
    [ $(id -u) != "0" ] && { echo -e "${RED}Error:${NO_COLOR} You must be root to run this script."; exit 1; }
}

# 判断是不是CentOS7
Check_release() {
    if [ -f /etc/redhat-release ];then
        release="centos"
        version=`sed -r 's/.* ([0-9]+)\..*/\1/' /etc/redhat-release`
    if [ "$version" = "7" ];then
        echo "Current release: CentOS7."
    else {
        echo -e "[${RED}Error${NO_COLOR}] This script can only be running on CentOS7."
        exit 1
    }
    fi
    else {
        echo -e "[${RED}Error${NO_COLOR}] This script can only be running on CentOS7."
    exit 1
    }
    fi
}

########################时区调整########################
timezone_adjust(){
    ln -sf  /usr/share/zoneinfo/Asia/Shanghai /etc/localtime
}

#修改网卡为eth0
modify_eth_card() {
   ip a | grep -q eth0
   if [ "$?" -eq 1 ];then
       sed -ri '/^GRUB_CMDLINE/s/(.*)"/\1 net.ifnames=0"/' /etc/default/grub
       grub2-mkconfig -o /boot/grub2/grub.cfg
   fi
   #sed -i "/UUID/d" /etc/sysconfig/network-scripts/ifcfg-ens33
   #sed -i "/DEVICE/d" /etc/sysconfig/network-scripts/ifcfg-ens33
   #echo "DNS1=114.114.114.114" >> /etc/sysconfig/network-scripts/ifcfg-ens33
   rm -f /etc/sysconfig/network-scripts/ifcfg-ens33
   cat > /etc/sysconfig/network-scripts/ifcfg-eth0 <<EOF
NAME="eth0"
ONBOOT=yes
NETBOOT=yes
BOOTPROTO=dhcp
TYPE=Ethernet
DNS1=114.114.114.114
EOF
}

#自动补全
bash_completion() {
    yum install bash-completion -y
    source /usr/share/bash-completion/bash_completion
}

#时间同步
time_sync(){
    yum install chrony -y
    sed '/^server/s/^/#/' /etc/chrony.conf -i
    sed '1a server ntp.aliyun.com iburst' /etc/chrony.conf -i
    sed '1a server 0.cn.pool.ntp.org iburst' /etc/chrony.conf -i
    sed '1a server ntp1.aliyun.com iburst' /etc/chrony.conf -i
    systemctl restart chronyd
    systemctl enable chronyd
    # echo '*/30 * * * * /usr/sbin/ntpdate ntp.aliyun.com &>/dev/null' >> /var/spool/cron/root
}

#ssh调优
ssh_adjust(){
    cp /etc/ssh/sshd_config{,_bak}
    sed '/^GSSAPIAuthentication/d' /etc/ssh/sshd_config -i
    sed '/^UseDNS/d' /etc/ssh/sshd_config -i
    echo "GSSAPIAuthentication no" >> /etc/ssh/sshd_config
    echo "UseDNS no" >> /etc/ssh/sshd_config
    systemctl restart sshd
}

#最大文件打开数
limits_tune(){
    echo '
*   soft nofile 128000
*   hard nofile 256000

root soft nofile 128000
root hard nofile 256000
' >> /etc/security/limits.conf
}


main() {
    judge_root
    Check_release
    replace_yum
    install_software
    iptables_selinux_stop
    modify_alias
    modify_vimrc
    timezone_adjust
    time_sync
    limits_tune
    ssh_adjust
    modify_PS1
    modify_eth_card
    bash_completion
}

main
[root@localhost ~]# bash reset4.0-test.sh
十、第二次备份(可以作为模版用了)
[root@es-2 machine]# scp centos7-1.qcow2 172.18.4.4:/opt/centos7-init.qcow2
十一、使用模版机克隆
1、准备xml文件
需要改的地方:name,memory,currentMemory,vcpu,source file(磁盘位置,镜像那也可以改下),mac address(不要随机生成,改几位就行)
mac地址也可以用vmware生成
[root@es-2 ~]# cat centos7-2.xml
<domain type='kvm'>
  <name>centos7-2</name>
  <memory unit='GiB'>1</memory>
  <currentMemory unit='GiB'>1</currentMemory>
  <vcpu placement='static'>2</vcpu>
  <sysinfo type='smbios'>
    <system>
      <entry name='manufacturer'>test</entry>
    </system>
  </sysinfo>
  <os>
    <type arch='x86_64' machine='pc'>hvm</type>
    <boot dev='hd'/>
    <bootmenu enable='yes'/>
    <smbios mode='sysinfo'/>
  </os>
  <features>
    <acpi/>
    <apic/>
    <pae/>
  </features>
  <clock offset='utc'/>
  <on_poweroff>destroy</on_poweroff>
  <on_reboot>restart</on_reboot>
  <on_crash>destroy</on_crash>
  <devices>
    <emulator>/usr/libexec/qemu-kvm</emulator>
    <disk type='file' device='disk'>
      <driver name='qemu' type='qcow2' cache='writeback'/>
      <source file='/data/machine/centos7-2.qcow2'/>
      <target dev='vda' bus='virtio'/>
    </disk>
    <disk type='file' device='cdrom'>
      <driver name='qemu' type='raw'/>
      <source file='/data/iso/CentOS-7-x86_64-Minimal-1908.iso'/>
      <target dev='hdb' bus='ide'/>
    <readonly/>
    </disk>
    <controller type='virtio-serial' index='0'>
    </controller>
    <controller type='usb' index='0' model='piix3-uhci'>
    </controller>
    <controller type='pci' index='0' model='pci-root'/>
    <serial type='pty'>
      <target type='isa-serial' port='0'>
        <model name='isa-serial'/>
      </target>
    </serial>
    <interface type='bridge'>
      <mac address='52:C7:CE:41:D5:EA'/>
      <source bridge='br0'/>
      <target dev='vnet0'/>
      <model type='virtio'/>
      <alias name='net0'/>
      <address type='pci' domain='0x0000' bus='0x00' slot='0x03' function='0x0'/>
    </interface>
    <console type='pty'>
      <target type='serial' port='0'/>
    </console>
    <input type='tablet' bus='usb'>
    </input>
    <input type='mouse' bus='ps2'/>
    <input type='keyboard' bus='ps2'/>
    <graphics type='vnc' port='-1' autoport='yes' listen='0.0.0.0'>
    </graphics>
    <video>
      <model type='cirrus' vram='16384' heads='1' primary='yes'/>
    </video>
    <memballoon model='virtio'>
      <stats period='10'/>
    </memballoon>
  </devices>
</domain>
2、按照配置文件把qcow2文件和镜像放到对应目录
[root@es-2 ~]# tree -C /data/
/data/
├── image
├── iso
│   └── CentOS-7-x86_64-Minimal-1908.iso
└── machine
    ├── centos7-1.qcow2
    └── centos7-2.qcow2
3、导入xml文件,启动
virsh define centos7-2.xml
virsh start centos7-2
4、关于mac地址
参考:https://www.douban.com/note/733401994/
MAC(Media Access Control,介质访问控制)地址,或称为MAC位址、硬件地址,用来定义网络设备的位置。MAC集成在网卡,由48bit的2进制的数字组成,0~23位数字叫作组织唯一标志符(organizationally unique,是识别局域网节点的标识)。24~47位是由厂家自己分配,其中第48位是组播地址标志位。网卡的物理地址通常是由网卡生产厂家写入网卡的EPROM芯片中,芯片中的数据可以通过程序进行擦写,它存储的是传输数据时真正赖以标识发出数据的电脑和接收数据的主机的地址。也就是说,在网络底层的物理传输过程中,数据传输是通过物理地址来识别主机的,它一定是全球唯一的。
error: unsupported configuration: Unable to use MAC address starting with reserved value 0xFE - 'fe:b0:75:50:34:c2' -
error: XML error: expected unicast mac address, found multicast '67:f7:bc:25:42:cf'