kubeadm部署两主两从k8s集群
缺陷: 先不说kubeadm能不能用于生产环境,首先下面的集群etcd没有单独部署,挂掉一台后集群还是不能用,因此,etcd必须单独部署(etcd是go语言研发,由CoreOS基于Raft协议开发的分布式键值存储,etcd存储着整个集群的状态信息和配置信息,生产环境中应该以etcd集群的方式运行以确保其服务可用性)
系统:ubuntu18.04.3
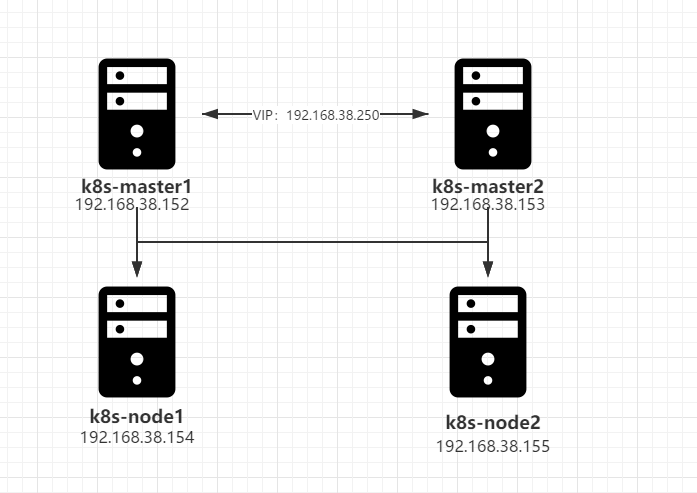
架构图:
kuberneteas中文社区:http://docs.kubernetes.org.cn/
kubernetes官方文档:https://kubernetes.io/zh/docs/
一、概念一定要知道
1.1kubernetes是什么
kubernetes是容器集群管理系统,是一个开源的平台,可以实现容器集群的自动化部署、自动扩缩容、维护等功能。
通过kubernetes,你可以
- 快速部署应用
- 快速扩展应用
- 无缝对接新的应用功能
- 节省资源,优化硬件资源的使用
1.2kubernetes特点
- 可移植: 支持公有云,私有云,混合云,多重云
- 可拓展: 模块化,插件化,可挂载,可组合
- 自动化: 自动部署,自动重启,自动复制,自动伸缩扩展
1.3为什么要使用容器
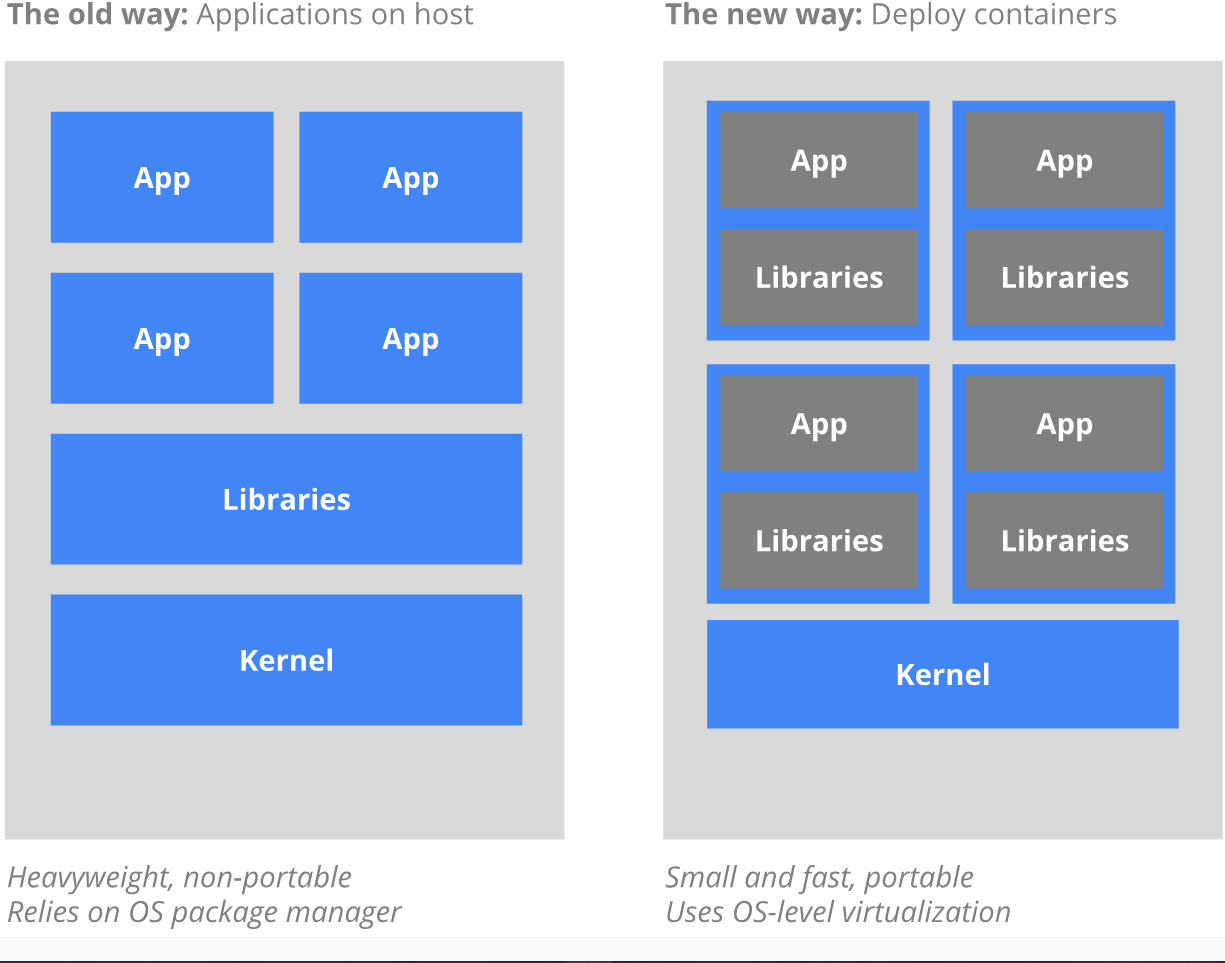
传统的应用部署方式是通过插件,脚本安装应用。这样做的缺点是应用的运行、配置管理、所有声明周期将与当前操作系统绑定,不利于应用的升级更新,回滚操作。而且虚拟机非常笨重,不利于可移植性。
新的方式是通过部署容器方式实现,每个容器之间相互隔离,每个容器有自己的文件系统,容器之间进程不会互相影响,能区分计算资源。相对于虚拟机,容器能快速部署,由于容器与底层设施、机器文件无关,所以它能在不同云,不同版本操作系统之间进行迁移。
容器资源占用少,部署快,每个应用可以被打包成一个容器镜像,每个应用与容器之间成一对一关系使得容器有更大的优势。每个应用不需要与其他应用堆栈组合,也不依赖于生产环境基础架构,这使得从研发到测试、生产能够提供一致环境。容器比虚拟机更轻量,更便于监控和管理。
容器优势总结
- 快速创建/部署应用:与虚拟机相比,容器镜像的创建更容易
- 持续开发,持续集成,持续部署
- 开发和运行相分离:在build和release阶段创建容器镜像,使得应用和基础设施解耦
- 开发,测试和生产环境一致:程序运行在容器中,不存在软件版本或系统版本不一致的问题
- 云平台或其他操作系统:可以在ubuntu,centos,rhel等环境运行
- 分布式,弹性,微服务化:程序被分为更小,独立的组件,可以动态部署和管理
- 资源的隔离
- 资源的有效利用:更充分利用服务器CPU,内存资源
1.4 使用kubernetes能做什么?
二、环境准备
2.1 服务器准备
准备4台虚拟机,两台做master,两台做node,配置最低2C2G,操作系统ubuntu18.04.3
| k8s-master1 | 192.168.38.152 | |
|---|---|---|
| k8s-master2 | 192.168.38.153 | |
| k8s-node1 | 192.168.38.154 | |
| k8s-node2 | 192.168.38.155 |
2.2 服务器基本优化
上篇文章已经做完:https://xyz.uscwifi.xyz/post/ubuntu18.04系统优化/
2.3 ssh密钥分发
[root@ubuntu scripts]# ssh-keygen -t rsa -C "k8s-master1" -f /root/.ssh/id_rsa -P ''
[root@ubuntu scripts]# apt install sshpass -y
[root@ubuntu scripts]# cat ssh-copy.sh
#!/bin/bash
#**************************************************************
#Author:                     Linus
#QQ:                         599503252
#Date:                       2019-12-11
#FileName:                   ssh-copy.sh
#URL:                        https://uscwifi.cn
#Description:                Initialize the new server
#Copyright (C):              2019 Copyright ©  站点名称  版权所有
#************************************************************
IP='192.168.38.152 192.168.38.153 192.168.38.154'
for i in ${IP};do
    sshpass -p 1 ssh-copy-id $i -o StrictHostKeyChecking=no
    if [ "$?" -eq 0 ];then
        echo "${i} 密钥copy完成"
    else
        echo "${i} 密钥copy失败"
    fi
done
[root@ubuntu scripts]# bash ssh-copy.sh
/usr/bin/ssh-copy-id: INFO: Source of key(s) to be installed: "/root/.ssh/id_rsa.pub"
/usr/bin/ssh-copy-id: INFO: attempting to log in with the new key(s), to filter out any that are already installed
/usr/bin/ssh-copy-id: INFO: 1 key(s) remain to be installed -- if you are prompted now it is to install the new keys

Number of key(s) added: 1

Now try logging into the machine, with:   "ssh -o 'StrictHostKeyChecking=no' '192.168.38.152'"
and check to make sure that only the key(s) you wanted were added.

192.168.38.152 密钥copy完成
/usr/bin/ssh-copy-id: INFO: Source of key(s) to be installed: "/root/.ssh/id_rsa.pub"
/usr/bin/ssh-copy-id: INFO: attempting to log in with the new key(s), to filter out any that are already installed
/usr/bin/ssh-copy-id: INFO: 1 key(s) remain to be installed -- if you are prompted now it is to install the new keys

Number of key(s) added: 1

Now try logging into the machine, with:   "ssh -o 'StrictHostKeyChecking=no' '192.168.38.153'"
and check to make sure that only the key(s) you wanted were added.

192.168.38.153 密钥copy完成
/usr/bin/ssh-copy-id: INFO: Source of key(s) to be installed: "/root/.ssh/id_rsa.pub"
/usr/bin/ssh-copy-id: INFO: attempting to log in with the new key(s), to filter out any that are already installed
/usr/bin/ssh-copy-id: INFO: 1 key(s) remain to be installed -- if you are prompted now it is to install the new keys

Number of key(s) added: 1

Now try logging into the machine, with:   "ssh -o 'StrictHostKeyChecking=no' '192.168.38.154'"
and check to make sure that only the key(s) you wanted were added.

192.168.38.154 密钥copy完成
2.3 主机名批量修改
[root@ubuntu ~]# hostnamectl set-hostname k8s-master1
[root@k8s-master1 ~]# ssh 192.168.38.153  hostnamectl set-hostname k8s-master2
[root@k8s-master1 ~]# ssh 192.168.38.154  hostnamectl set-hostname k8s-node1
2.4 hosts修改
[root@k8s-master1 ~]# cat >> /etc/hosts <<EOF
192.168.38.152 k8s-master1
192.168.38.153 k8s-master2
192.168.38.154 k8s-node1
192.168.38.155 k8s-node2
EOF
[root@k8s-master1 ~]# for i in 192.168.38.15{2,3,4};do scp /etc/hosts $i:/etc/;done
2.5 docker安装
优化文章已经做过
关于daemon.json参数建议
1.data-root docker数据存放目录
2.registry-mirrors 镜像加速
3.log-driver 日志记录格式可以考虑设置为json-file
4.log-opts 设置日志选项,日志数量,大小等
5.live-restore设置为true docker重启后而容器不重启
6.存储引擎可以不改了,现在最新的centos和ubuntu都是overlay存储
参考:https://docs.docker.com/engine/reference/commandline/dockerd/#daemon-configuration-file
2.6 kubernetes安装
优化文章已经做过
2.7 关闭swap
swapoff -a && sed -i '/swap/ s/^/#/' /etc/fstab
如果有条件就关了,貌似官网现在要求必须关swap
https://kubernetes.io/docs/setup/production-environment/tools/kubeadm/install-kubeadm/
2.8 关于这几个内核参数
安装docker时已经设定
net.bridge.bridge-nf-call-arptables = 1
net.bridge.bridge-nf-call-ip6tables = 1
net.bridge.bridge-nf-call-iptables = 1
net.ipv4.ip_forward = 1
2.9 关于kubelet
安装时候已经开启自启动systemctl status kubelet可以看到
三、初始化
3.1 查看需要的镜像
[root@k8s-master1 ~]# kubeadm config images list
k8s.gcr.io/kube-apiserver:v1.16.3
k8s.gcr.io/kube-controller-manager:v1.16.3
k8s.gcr.io/kube-scheduler:v1.16.3
k8s.gcr.io/kube-proxy:v1.16.3
k8s.gcr.io/pause:3.1
k8s.gcr.io/etcd:3.3.15-0
k8s.gcr.io/coredns:1.6.2
3.2 部署keepalived
两个master节点的话就部署个keepalived吧,control-plane-endpoint指向VIP,master挂掉后VIP自动漂移
[root@k8s-master1 ~]# apt install keepalived -y
[root@k8s-master1 keepalived]# cat keepalived.conf
! Configuration File for keepalived

global_defs {
   router_id node1
}

vrrp_instance VI_1 {
    state MASTER
    interface eth0
    virtual_router_id 50
    priority 100
    advert_int 1
    authentication {
        auth_type PASS
	auth_pass dfsgfd
    }
    virtual_ipaddress {
        192.168.38.250/24 dev eth0
    }
}
[root@k8s-master2 ~]# cat /etc/keepalived/keepalived.conf
! Configuration File for keepalived

global_defs {
   router_id node1
}

vrrp_instance VI_1 {
    state MASTER
    interface eth0
    virtual_router_id 50
    priority 99
    advert_int 1
    authentication {
        auth_type PASS
	auth_pass dfsgfd
    }
    virtual_ipaddress {
        192.168.38.250/24 dev eth0
    }
}
3.3 使用命令初始化
同理也可以使用yaml文件初始化
提前拉镜像,避免错误
[root@k8s-master2 ~]# kubeadm config images pull --image-repository registry.aliyuncs.com/google_containers
W1211 15:22:28.130315   48728 version.go:101] could not fetch a Kubernetes version from the internet: unable to get URL "https://dl.k8s.io/release/stable-1.txt": Get https://dl.k8s.io/release/stable-1.txt: dial tcp 35.201.71.162:443: connect: connection timed out
W1211 15:22:28.130417   48728 version.go:102] falling back to the local client version: v1.16.3
[config/images] Pulled registry.aliyuncs.com/google_containers/kube-apiserver:v1.16.3
[config/images] Pulled registry.aliyuncs.com/google_containers/kube-controller-manager:v1.16.3
[config/images] Pulled registry.aliyuncs.com/google_containers/kube-scheduler:v1.16.3
[config/images] Pulled registry.aliyuncs.com/google_containers/kube-proxy:v1.16.3
[config/images] Pulled registry.aliyuncs.com/google_containers/pause:3.1
[config/images] Pulled registry.aliyuncs.com/google_containers/etcd:3.3.15-0
[config/images] Pulled registry.aliyuncs.com/google_containers/coredns:1.6.2
[root@k8s-master1 ~]# kubeadm init  \
--apiserver-advertise-address 192.168.38.152 \
--image-repository registry.aliyuncs.com/google_containers \
--kubernetes-version v1.16.3 \
--service-cidr 10.96.0.0/12 \
--pod-network-cidr 10.244.0.0/16 \
--control-plane-endpoint 192.168.38.250
输出信息
[init] Using Kubernetes version: v1.16.3       #[init] 指定版本进行初始化工作
[preflight] Running pre-flight checks          #[preflight] 初始化前的检查和下载所需的Docker镜像文件
	[WARNING IsDockerSystemdCheck]: detected "cgroupfs" as the Docker cgroup driver. The recommended driver is "systemd". Please follow the guide at https://kubernetes.io/docs/setup/cri/
	[WARNING SystemVerification]: this Docker version is not on the list of validated versions: 19.03.5. Latest validated version: 18.09
[preflight] Pulling images required for setting up a Kubernetes cluster
[preflight] This might take a minute or two, depending on the speed of your internet connection
[preflight] You can also perform this action in beforehand using 'kubeadm config images pull'
[kubelet-start] Writing kubelet environment file with flags to file "/var/lib/kubelet/kubeadm-flags.env"   #[kubelet-start] 生成kubelet的配置文件"/var/lib/kubelet/kubeadm-flags.env",没有这个文件,kubelet无法启动
[kubelet-start] Writing kubelet configuration to file "/var/lib/kubelet/config.yaml"
[kubelet-start] Activating the kubelet service
[certs] Using certificateDir folder "/etc/kubernetes/pki"    # [cert] 生成k8s使用的证书,存放在/etc/kubernetes/pki中
[certs] Generating "ca" certificate and key
[certs] Generating "apiserver" certificate and key
[certs] apiserver serving cert is signed for DNS names [k8s-master1 kubernetes kubernetes.default kubernetes.default.svc kubernetes.default.svc.cluster.local] and IPs [10.96.0.1 192.168.38.152 192.168.38.250]
[certs] Generating "apiserver-kubelet-client" certificate and key
[certs] Generating "front-proxy-ca" certificate and key
[certs] Generating "front-proxy-client" certificate and key
[certs] Generating "etcd/ca" certificate and key
[certs] Generating "etcd/server" certificate and key
[certs] etcd/server serving cert is signed for DNS names [k8s-master1 localhost] and IPs [192.168.38.152 127.0.0.1 ::1]
[certs] Generating "etcd/peer" certificate and key
[certs] etcd/peer serving cert is signed for DNS names [k8s-master1 localhost] and IPs [192.168.38.152 127.0.0.1 ::1]
[certs] Generating "etcd/healthcheck-client" certificate and key
[certs] Generating "apiserver-etcd-client" certificate and key
[certs] Generating "sa" key and public key
[kubeconfig] Using kubeconfig folder "/etc/kubernetes"   #[kubeconfig] 生成ubeconfig文件,存放在/etc/kubernetes目录中,组件之间通信需要使用对应文件
[kubeconfig] Writing "admin.conf" kubeconfig file
[kubeconfig] Writing "kubelet.conf" kubeconfig file
[kubeconfig] Writing "controller-manager.conf" kubeconfig file
[kubeconfig] Writing "scheduler.conf" kubeconfig file
[control-plane] Using manifest folder "/etc/kubernetes/manifests"  #[control-plane] 使用/etc/kubernetes/manifests目录下面的YAML文件,安装master组件
[control-plane] Creating static Pod manifest for "kube-apiserver"
[control-plane] Creating static Pod manifest for "kube-controller-manager"
[control-plane] Creating static Pod manifest for "kube-scheduler"
[etcd] Creating static Pod manifest for local etcd in "/etc/kubernetes/manifests"  #[etcd] 使用"/etc/kubernetes/manifests/etcd.yaml"安装etcd服务
[wait-control-plane] Waiting for the kubelet to boot up the control plane as static Pods from directory "/etc/kubernetes/manifests". This can take up to 4m0s   #等待control-plane部署的master服务
[apiclient] All control plane components are healthy after 22.507332 seconds  #[apiclient] 检查master组件服务状态
[upload-config] Storing the configuration used in ConfigMap "kubeadm-config" in the "kube-system" Namespace   #[upload-confid] 更新配置
[kubelet] Creating a ConfigMap "kubelet-config-1.16" in namespace kube-system with the configuration for the kubelets in the cluster  #[kubelet] 使用configMap配置kubelet
[upload-certs] Skipping phase. Please see --upload-certs
[mark-control-plane] Marking the node k8s-master1 as control-plane by adding the label "node-role.kubernetes.io/master=''"
[mark-control-plane] Marking the node k8s-master1 as control-plane by adding the taints [node-role.kubernetes.io/master:NoSchedule]  #[mark-control-plane] 为当前节点打标签,打了master,不可调度标签,这样默认就不会使用master运行pod
[bootstrap-token] Using token: 17vij8.4dzzjlu1aa9qldt9   #[bootstrap-token]生成token记录下来。下面kubeadm join要用
[bootstrap-token] Configuring bootstrap tokens, cluster-info ConfigMap, RBAC Roles
[bootstrap-token] configured RBAC rules to allow Node Bootstrap tokens to post CSRs in order for nodes to get long term certificate credentials
[bootstrap-token] configured RBAC rules to allow the csrapprover controller automatically approve CSRs from a Node Bootstrap Token
[bootstrap-token] configured RBAC rules to allow certificate rotation for all node client certificates in the cluster
[bootstrap-token] Creating the "cluster-info" ConfigMap in the "kube-public" namespace
[addons] Applied essential addon: CoreDNS    #[addons]安装附加组件Cor儿DNS和kube-proxy
[addons] Applied essential addon: kube-proxy

Your Kubernetes control-plane has initialized successfully!

To start using your cluster, you need to run the following as a regular user:

  mkdir -p $HOME/.kube
  sudo cp -i /etc/kubernetes/admin.conf $HOME/.kube/config
  sudo chown $(id -u):$(id -g) $HOME/.kube/config

You should now deploy a pod network to the cluster.
Run "kubectl apply -f [podnetwork].yaml" with one of the options listed at:
  https://kubernetes.io/docs/concepts/cluster-administration/addons/

You can now join any number of control-plane nodes by copying certificate authorities
and service account keys on each node and then running the following as root:

  kubeadm join 192.168.38.250:6443 --token 17vij8.4dzzjlu1aa9qldt9 \
    --discovery-token-ca-cert-hash sha256:a8bb8825f32441a4c49f1ffb641394679dc4ad1d71e76af8852083afc1a3e712 \
    --control-plane

Then you can join any number of worker nodes by running the following on each as root:

kubeadm join 192.168.38.250:6443 --token 17vij8.4dzzjlu1aa9qldt9 \
    --discovery-token-ca-cert-hash sha256:a8bb8825f32441a4c49f1ffb641394679dc4ad1d71e76af8852083afc1a3e712
3.4 为master节点准备kubeconfig文件
[root@k8s-master1 ~]# mkdir -p $HOME/.kube
[root@k8s-master1 ~]# sudo cp -i /etc/kubernetes/admin.conf $HOME/.kube/config
[root@k8s-master1 ~]# sudo chown $(id -u):$(id -g) $HOME/.kube/config
3.5 查看节点状态
notready是因为还为部署网络插件
[root@k8s-master1 ~]# kubectl get node -o wide
NAME          STATUS     ROLES    AGE   VERSION   INTERNAL-IP      EXTERNAL-IP   OS-IMAGE             KERNEL-VERSION      CONTAINER-RUNTIME
k8s-master1   NotReady   master   13m   v1.16.3   192.168.38.152   <none>        Ubuntu 18.04.3 LTS   4.15.0-73-generic   docker://19.3.5
3.6 安装flannel网络插件
来自:https://github.com/coreos/flannel
[root@k8s-master1 ~]# kubectl apply -f kube-flannel.yml
podsecuritypolicy.policy/psp.flannel.unprivileged created
clusterrole.rbac.authorization.k8s.io/flannel created
clusterrolebinding.rbac.authorization.k8s.io/flannel created
serviceaccount/flannel created
configmap/kube-flannel-cfg created
daemonset.apps/kube-flannel-ds-amd64 created
daemonset.apps/kube-flannel-ds-arm64 created
daemonset.apps/kube-flannel-ds-arm created
daemonset.apps/kube-flannel-ds-ppc64le created
daemonset.apps/kube-flannel-ds-s390x created
四、部署master2节点
4.1 scp证书或者新建个证书
[root@k8s-master1 scripts]# cat k8s-cert.sh
#!/bin/bash
#**************************************************************
#Author:                     Linus
#QQ:                         599503252
#Date:                       2019-12-11
#FileName:                   k8s-cert.sh
#URL:                        https://uscwifi.cn
#Description:                Initialize the new server
#Copyright (C):              2019 Copyright ©  站点名称  版权所有
#************************************************************
MASTER_IP="192.168.38.153"
for i in ${MASTER_IP};do
    ssh  $i "mkdir -p /etc/kubernetes/pki/etcd"
    scp /etc/kubernetes/pki/ca.* $i:/etc/kubernetes/pki/
    scp /etc/kubernetes/pki/sa.* $i:/etc/kubernetes/pki/
    scp /etc/kubernetes/pki/front-proxy-ca.* $i:/etc/kubernetes/pki/
    scp /etc/kubernetes/pki/etcd/ca.* $i:/etc/kubernetes/pki/etcd/
    scp /etc/kubernetes/admin.conf  $i:/etc/kubernetes/
done
[root@k8s-master1 scripts]# bash k8s-cert.sh
[root@k8s-master2 ~]# kubeadm join 192.168.38.250:6443 --token 17vij8.4dzzjlu1aa9qldt9     --discovery-token-ca-cert-hash sha256:a8bb8825f32441a4c49f1ffb641394679dc4ad1d71e76af8852083afc1a3e712     --control-plane
[preflight] Running pre-flight checks
	[WARNING IsDockerSystemdCheck]: detected "cgroupfs" as the Docker cgroup driver. The recommended driver is "systemd". Please follow the guide at https://kubernetes.io/docs/setup/cri/
	[WARNING SystemVerification]: this Docker version is not on the list of validated versions: 19.03.5. Latest validated version: 18.09
[preflight] Reading configuration from the cluster...
[preflight] FYI: You can look at this config file with 'kubectl -n kube-system get cm kubeadm-config -oyaml'
[preflight] Running pre-flight checks before initializing the new control plane instance
[preflight] Pulling images required for setting up a Kubernetes cluster
[preflight] This might take a minute or two, depending on the speed of your internet connection
[preflight] You can also perform this action in beforehand using 'kubeadm config images pull'
[certs] Using certificateDir folder "/etc/kubernetes/pki"
[certs] Generating "apiserver" certificate and key
[certs] apiserver serving cert is signed for DNS names [k8s-master2 kubernetes kubernetes.default kubernetes.default.svc kubernetes.default.svc.cluster.local] and IPs [10.96.0.1 192.168.38.153 192.168.38.250]
[certs] Generating "apiserver-kubelet-client" certificate and key
[certs] Generating "front-proxy-client" certificate and key
[certs] Generating "etcd/server" certificate and key
[certs] etcd/server serving cert is signed for DNS names [k8s-master2 localhost] and IPs [192.168.38.153 127.0.0.1 ::1]
[certs] Generating "etcd/healthcheck-client" certificate and key
[certs] Generating "apiserver-etcd-client" certificate and key
[certs] Generating "etcd/peer" certificate and key
[certs] etcd/peer serving cert is signed for DNS names [k8s-master2 localhost] and IPs [192.168.38.153 127.0.0.1 ::1]
[certs] Valid certificates and keys now exist in "/etc/kubernetes/pki"
[certs] Using the existing "sa" key
[kubeconfig] Generating kubeconfig files
[kubeconfig] Using kubeconfig folder "/etc/kubernetes"
[kubeconfig] Using existing kubeconfig file: "/etc/kubernetes/admin.conf"
[kubeconfig] Writing "controller-manager.conf" kubeconfig file
[kubeconfig] Writing "scheduler.conf" kubeconfig file
[control-plane] Using manifest folder "/etc/kubernetes/manifests"
[control-plane] Creating static Pod manifest for "kube-apiserver"
[control-plane] Creating static Pod manifest for "kube-controller-manager"
[control-plane] Creating static Pod manifest for "kube-scheduler"
[check-etcd] Checking that the etcd cluster is healthy
[kubelet-start] Downloading configuration for the kubelet from the "kubelet-config-1.16" ConfigMap in the kube-system namespace
[kubelet-start] Writing kubelet configuration to file "/var/lib/kubelet/config.yaml"
[kubelet-start] Writing kubelet environment file with flags to file "/var/lib/kubelet/kubeadm-flags.env"
[kubelet-start] Activating the kubelet service
[kubelet-start] Waiting for the kubelet to perform the TLS Bootstrap...
[etcd] Announced new etcd member joining to the existing etcd cluster
[etcd] Creating static Pod manifest for "etcd"
[etcd] Waiting for the new etcd member to join the cluster. This can take up to 40s
{"level":"warn","ts":"2019-12-11T16:34:03.478+0800","caller":"clientv3/retry_interceptor.go:61","msg":"retrying of unary invoker failed","target":"passthrough:///https://192.168.38.153:2379","attempt":0,"error":"rpc error: code = DeadlineExceeded desc = context deadline exceeded"}
[upload-config] Storing the configuration used in ConfigMap "kubeadm-config" in the "kube-system" Namespace
[mark-control-plane] Marking the node k8s-master2 as control-plane by adding the label "node-role.kubernetes.io/master=''"
[mark-control-plane] Marking the node k8s-master2 as control-plane by adding the taints [node-role.kubernetes.io/master:NoSchedule]

This node has joined the cluster and a new control plane instance was created:

* Certificate signing request was sent to apiserver and approval was received.
* The Kubelet was informed of the new secure connection details.
* Control plane (master) label and taint were applied to the new node.
* The Kubernetes control plane instances scaled up.
* A new etcd member was added to the local/stacked etcd cluster.

To start administering your cluster from this node, you need to run the following as a regular user:

	mkdir -p $HOME/.kube
	sudo cp -i /etc/kubernetes/admin.conf $HOME/.kube/config
	sudo chown $(id -u):$(id -g) $HOME/.kube/config

Run 'kubectl get nodes' to see this node join the cluster.
4.2 为master2节点准备kubeconfig文件
mkdir -p $HOME/.kube
sudo cp -i /etc/kubernetes/admin.conf $HOME/.kube/config
sudo chown $(id -u):$(id -g) $HOME/.kube/config
[root@k8s-master2 ~]# kubectl get nodes
NAME          STATUS   ROLES    AGE     VERSION
k8s-master1   Ready    master   53m     v1.16.3
k8s-master2   Ready    master   2m16s   v1.16.3
五、node加入集群
[root@k8s-node1 ~]# kubeadm join 192.168.38.250:6443 --token 17vij8.4dzzjlu1aa9qldt9 \
>     --discovery-token-ca-cert-hash sha256:a8bb8825f32441a4c49f1ffb641394679dc4ad1d71e76af8852083afc1a3e712
[preflight] Running pre-flight checks
	[WARNING IsDockerSystemdCheck]: detected "cgroupfs" as the Docker cgroup driver. The recommended driver is "systemd". Please follow the guide at https://kubernetes.io/docs/setup/cri/
	[WARNING SystemVerification]: this Docker version is not on the list of validated versions: 19.03.5. Latest validated version: 18.09
[preflight] Reading configuration from the cluster...
[preflight] FYI: You can look at this config file with 'kubectl -n kube-system get cm kubeadm-config -oyaml'
[kubelet-start] Downloading configuration for the kubelet from the "kubelet-config-1.16" ConfigMap in the kube-system namespace
[kubelet-start] Writing kubelet configuration to file "/var/lib/kubelet/config.yaml"
[kubelet-start] Writing kubelet environment file with flags to file "/var/lib/kubelet/kubeadm-flags.env"
[kubelet-start] Activating the kubelet service
[kubelet-start] Waiting for the kubelet to perform the TLS Bootstrap...

This node has joined the cluster:
* Certificate signing request was sent to apiserver and a response was received.
* The Kubelet was informed of the new secure connection details.

Run 'kubectl get nodes' on the control-plane to see this node join the cluster.
六、测试
6.1 看集群节点状态
[root@k8s-master1 scripts]# kubectl get nodes -o wide
NAME          STATUS   ROLES    AGE     VERSION   INTERNAL-IP      EXTERNAL-IP   OS-IMAGE             KERNEL-VERSION      CONTAINER-RUNTIME
k8s-master1   Ready    master   57m     v1.16.3   192.168.38.152   <none>        Ubuntu 18.04.3 LTS   4.15.0-73-generic   docker://19.3.5
k8s-master2   Ready    master   6m31s   v1.16.3   192.168.38.153   <none>        Ubuntu 18.04.3 LTS   4.15.0-73-generic   docker://19.3.5
k8s-node1     Ready    <none>   57s     v1.16.3   192.168.38.154   <none>        Ubuntu 18.04.3 LTS   4.15.0-73-generic   docker://19.3.5
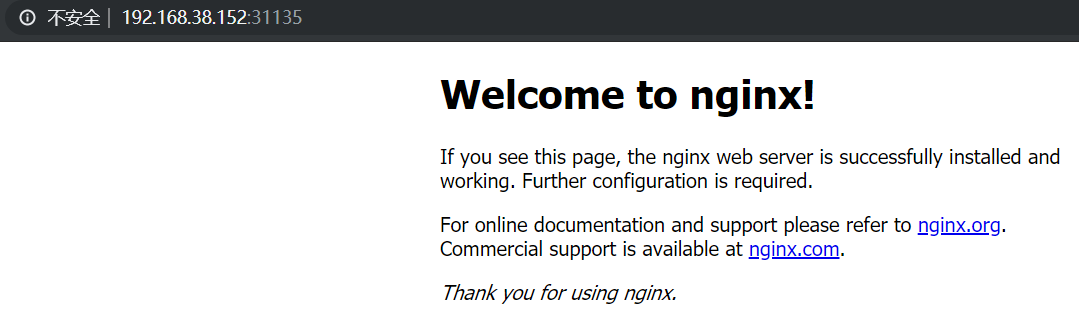
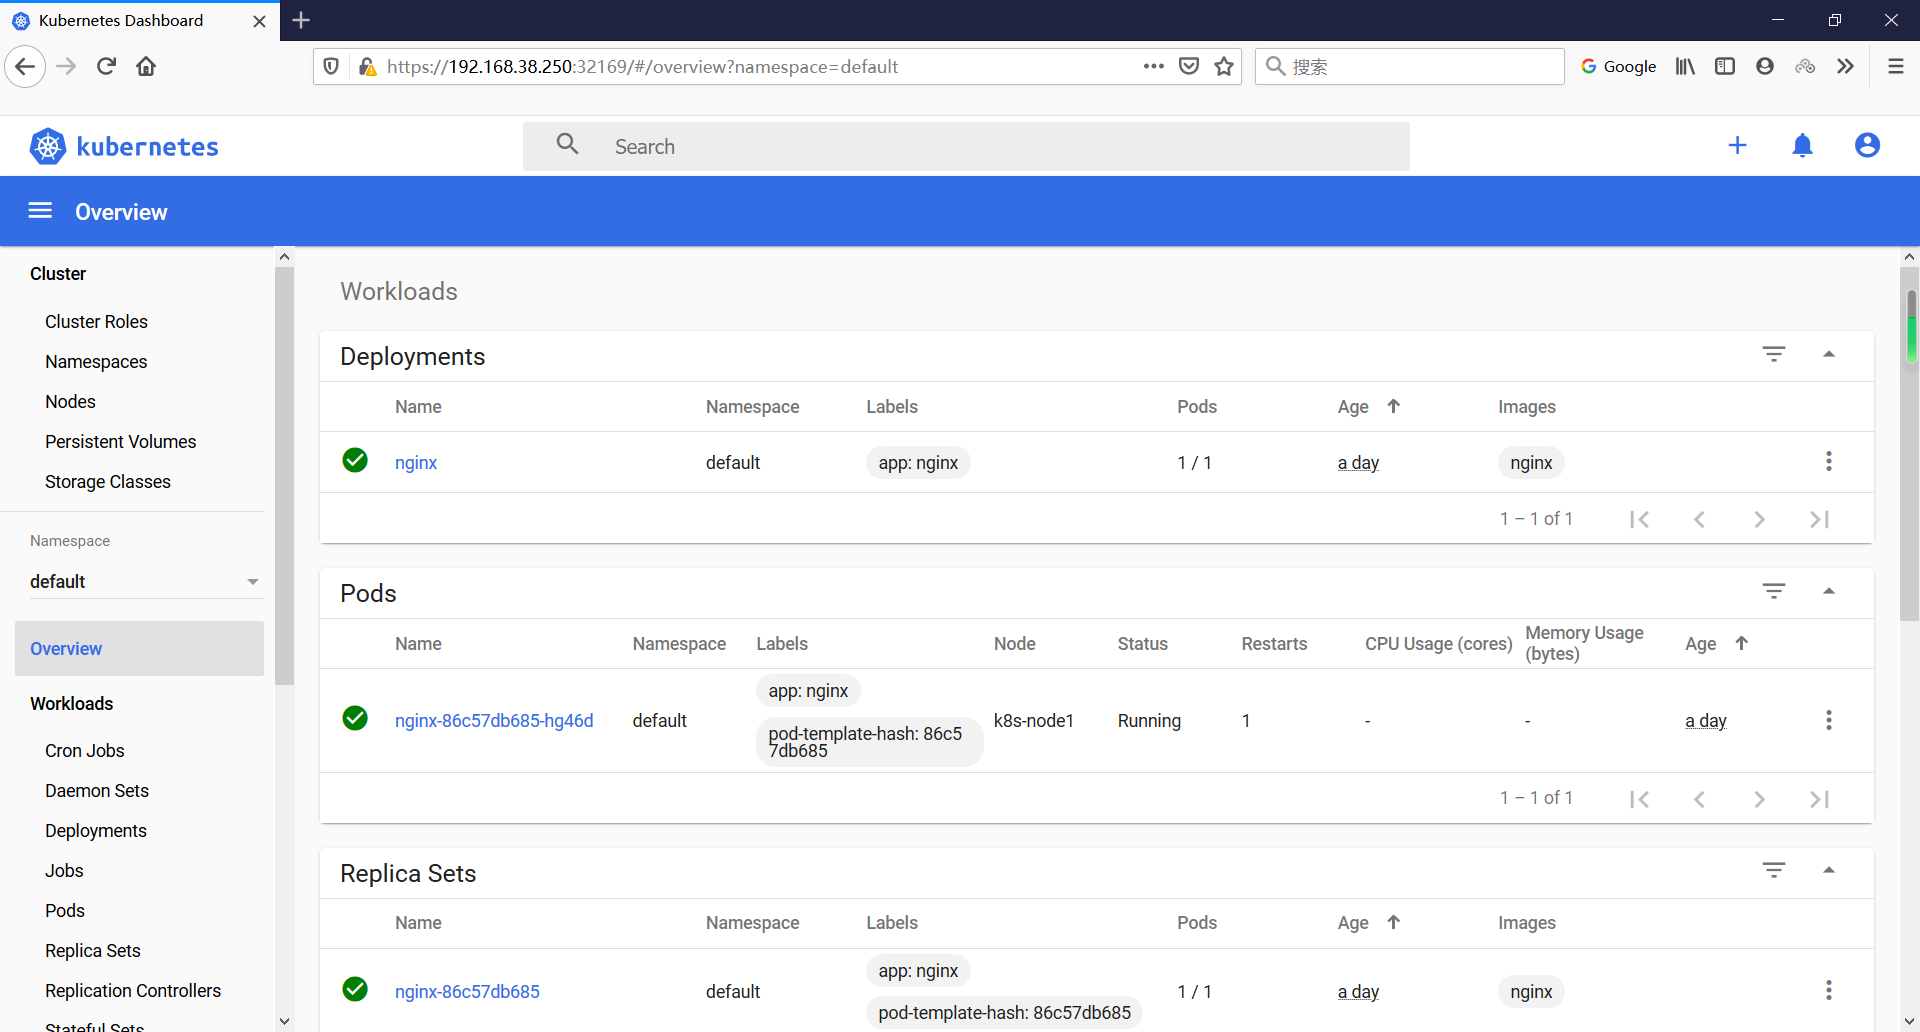
6.2 部署一个nginx测试
[root@k8s-master1 ~]# kubectl create deployment nginx  --image=nginx
deployment.apps/nginx created
[root@k8s-master1 ~]# kubectl expose deployment nginx --port=80 --type=NodePort
service/nginx exposed
[root@k8s-master1 ~]# kubectl get pod,svc
NAME                         READY   STATUS    RESTARTS   AGE
pod/nginx-86c57db685-hg46d   1/1     Running   0          5m18s

NAME                 TYPE        CLUSTER-IP      EXTERNAL-IP   PORT(S)        AGE
service/kubernetes   ClusterIP   10.96.0.1       <none>        443/TCP        67m
service/nginx        NodePort    10.111.108.62   <none>        80:31135/TCP   5m13s
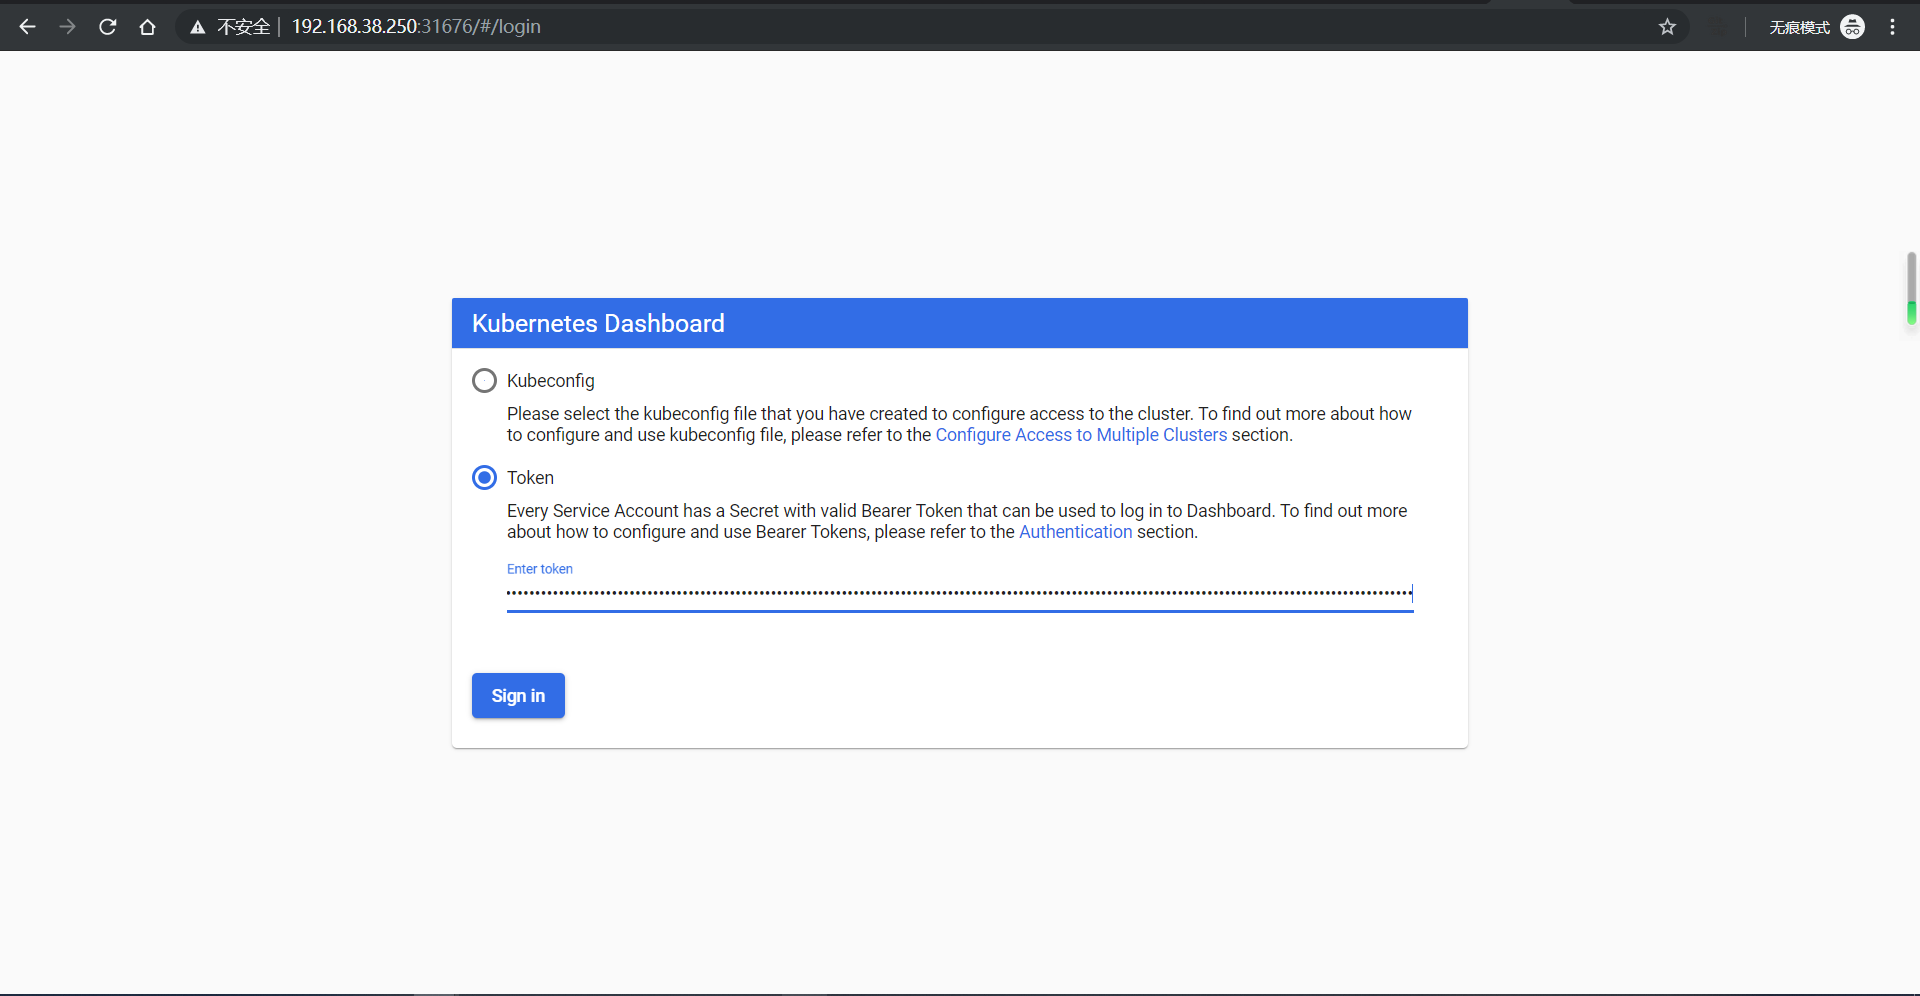
七、部署dashboard
7.1 项目地址
https://github.com/kubernetes/dashboard/releases
https://kubernetes.io/docs/tasks/access-application-cluster/web-ui-dashboard/
[root@k8s-master1 yaml]# wget https://raw.githubusercontent.com/kubernetes/dashboard/v2.0.0-beta6/aio/deploy/recommended.yaml
[root@k8s-master1 yaml]# diff recommended.yaml recommended2.yaml
39a40
>   type: NodePort
[root@k8s-master1 yaml]# kubectl apply -f recommended2.yaml
namespace/kubernetes-dashboard created
serviceaccount/kubernetes-dashboard created
service/kubernetes-dashboard created
secret/kubernetes-dashboard-certs created
secret/kubernetes-dashboard-csrf created
secret/kubernetes-dashboard-key-holder created
configmap/kubernetes-dashboard-settings created
role.rbac.authorization.k8s.io/kubernetes-dashboard created
clusterrole.rbac.authorization.k8s.io/kubernetes-dashboard created
rolebinding.rbac.authorization.k8s.io/kubernetes-dashboard created
clusterrolebinding.rbac.authorization.k8s.io/kubernetes-dashboard created
deployment.apps/kubernetes-dashboard created
service/dashboard-metrics-scraper created
deployment.apps/dashboard-metrics-scraper created
[root@k8s-master1 yaml]# kubectl get pod,svc -n kubernetes-dashboard
NAME                                             READY   STATUS    RESTARTS   AGE
pod/dashboard-metrics-scraper-76585494d8-7dh7b   1/1     Running   0          8m10s
pod/kubernetes-dashboard-b65488c4-ddwqt          1/1     Running   1          8m11s

NAME                                TYPE        CLUSTER-IP       EXTERNAL-IP   PORT(S)         AGE
service/dashboard-metrics-scraper   ClusterIP   10.109.210.101   <none>        8000/TCP        8m11s
service/kubernetes-dashboard        NodePort    10.107.125.77    <none>        443:32169/TCP   8m13s
7.2 生成token
来自:https://github.com/kubernetes/dashboard/blob/master/docs/user/access-control/creating-sample-user.md
[root@k8s-master1 yaml]# cat admin-count.yaml
apiVersion: v1
kind: ServiceAccount
metadata:
  name: admin-user
  namespace: kubernetes-dashboard

---

apiVersion: rbac.authorization.k8s.io/v1
kind: ClusterRoleBinding
metadata:
  name: admin-user
roleRef:
  apiGroup: rbac.authorization.k8s.io
  kind: ClusterRole
  name: cluster-admin
subjects:
- kind: ServiceAccount
  name: admin-user
  namespace: kubernetes-dashboard
[root@k8s-master1 yaml]# kubectl apply -f admin-count.yaml
serviceaccount/admin-user created
clusterrolebinding.rbac.authorization.k8s.io/admin-user created
通过下面命令找到token
[root@k8s-master1 yaml]# kubectl -n kubernetes-dashboard describe secret $(kubectl -n kubernetes-dashboard get secret | grep admin-user | awk '{print $1}')
Name: admin-user-token-lpdjw
Namespace: kubernetes-dashboard
Labels: <none>
Annotations: kubernetes.io/service-account.name: admin-user
kubernetes.io/service-account.uid: 967145f4-a3f7-464d-bc0f-0ffd38b2b06c
Type: kubernetes.io/service-account-token
Data
====
ca.crt: 1025 bytes
namespace: 20 bytes
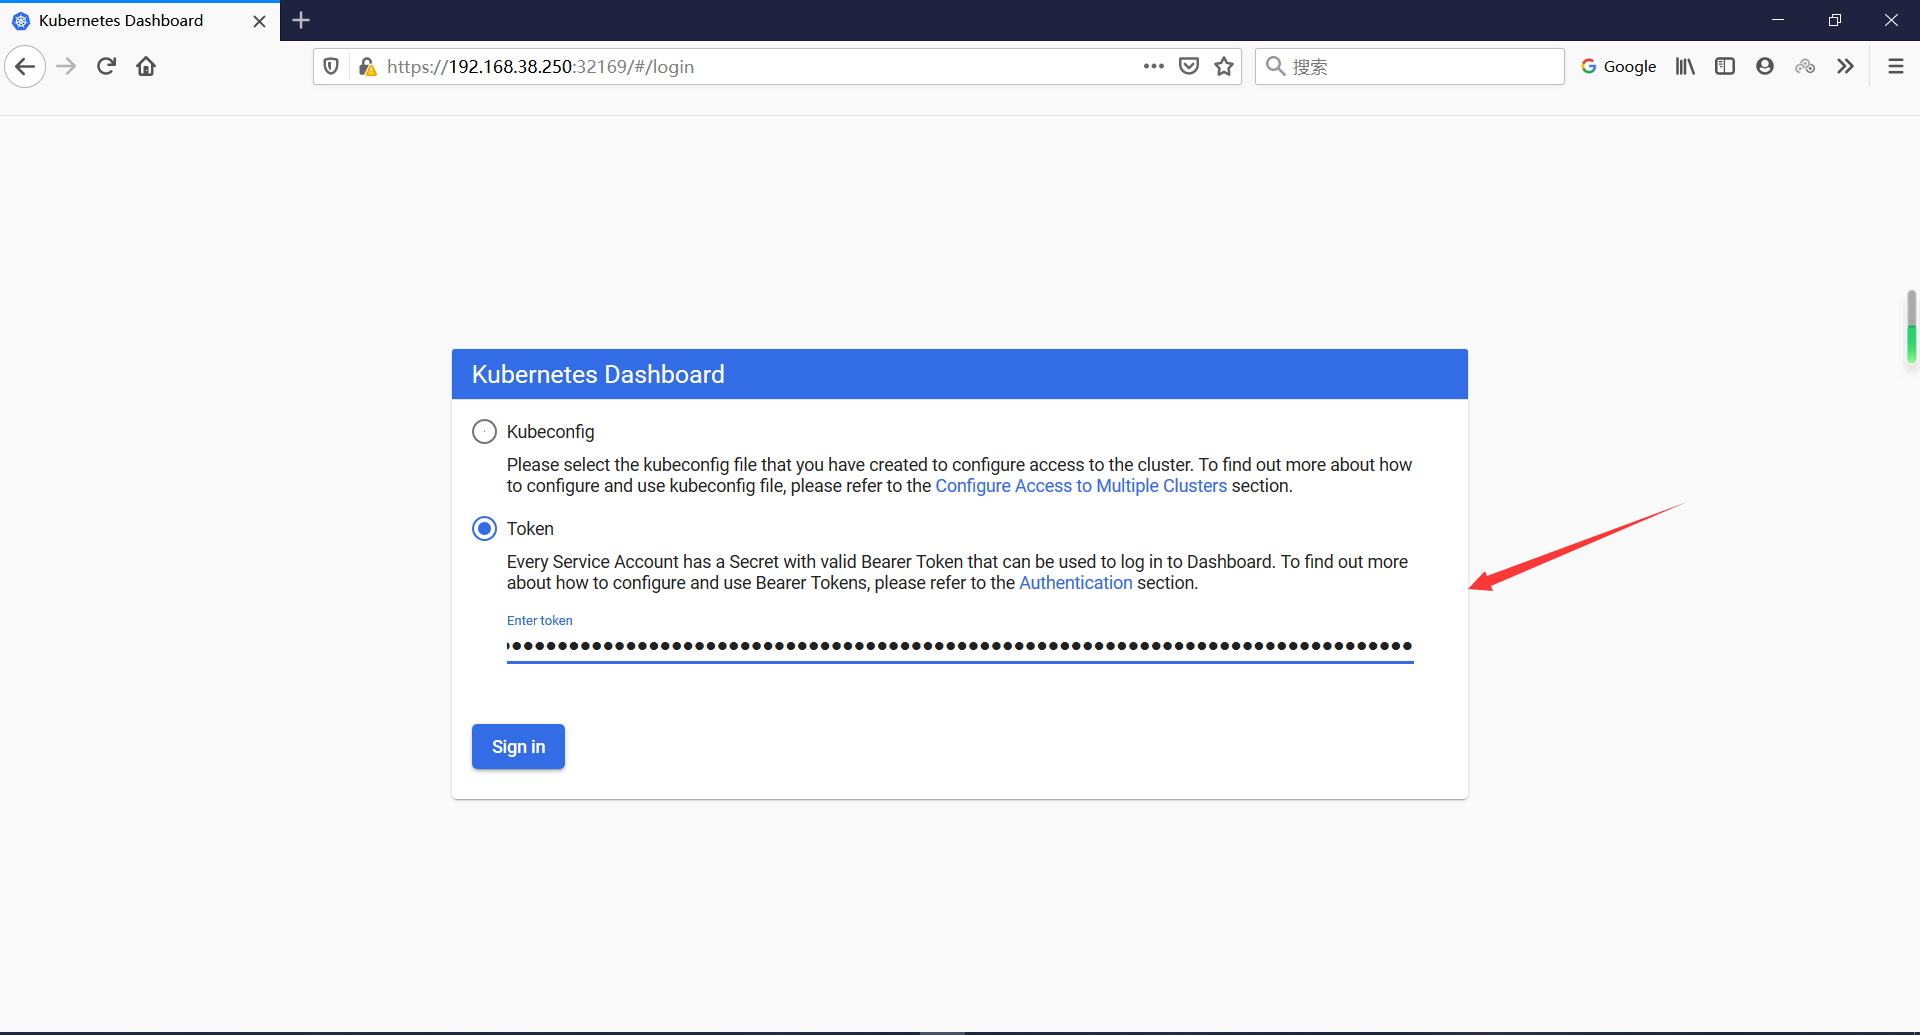
token: eyJhbGciOiJSUzI1NiIsImtpZCI6InBCWGtucDNKN2xrUW5fSlRwWlVJbkpTOV9rdXB2emFDRGx2TWhHYTFfMWcifQ.eyJpc3MiOiJrdWJlcm5ldGVzL3NlcnZpY2VhY2NvdW50Iiwia3ViZXJuZXRlcy5pby9zZXJ2aWNlYWNjb3VudC9uYW1lc3BhY2UiOiJrdWJlcm5ldGVzLWRhc2hib2FyZCIsImt1YmVybmV0ZXMuaW8vc2VydmljZWFjY291bnQvc2VjcmV0Lm5hbWUiOiJhZG1pbi11c2VyLXRva2VuLWxwZGp3Iiwia3ViZXJuZXRlcy5pby9zZXJ2aWNlYWNjb3VudC9zZXJ2aWNlLWFjY291bnQubmFtZSI6ImFkbWluLXVzZXIiLCJrdWJlcm5ldGVzLmlvL3NlcnZpY2VhY2NvdW50L3NlcnZpY2UtYWNjb3VudC51aWQiOiI5NjcxNDVmNC1hM2Y3LTQ2NGQtYmMwZi0wZmZkMzhiMmIwNmMiLCJzdWIiOiJzeXN0ZW06c2VydmljZWFjY291bnQ6a3ViZXJuZXRlcy1kYXNoYm9hcmQ6YWRtaW4tdXNlciJ9.DwgHADEH9xukMirg0uza3stA5uRP94blneIzmbSqTacN4stfjXSVOmeeD8DrYK_KWJoN93nGA2jarul8alH6s-DlvmU6DGhdE3vNM02vvoaYWsXbobabRORPQA3Vm6_ezZlC3hPJsH3xntN_bkz00_wi9aJfR9aO4jQPOBu3hhvhNKoFLIAXXeAZtM1lL7thDh924UGSFspnQ6OmB3ilioJ7pAXzb2kHlqM89gQ83i6zuaB0QiALN13TgcUM_EWOiaTTXnMUERFmIfFa-dE6vgFy9xlBrx0Cqa4DJkQXcN2e3NAUIHiDQMAX1-nGcEcZSlO1jIs5WHTsZOTpRgTSPg
使用这一长串token登陆(火狐浏览器访问https://192.168.38.250:32169/)
7.3 为何谷歌浏览器不能访问
只能火狐浏览器访问
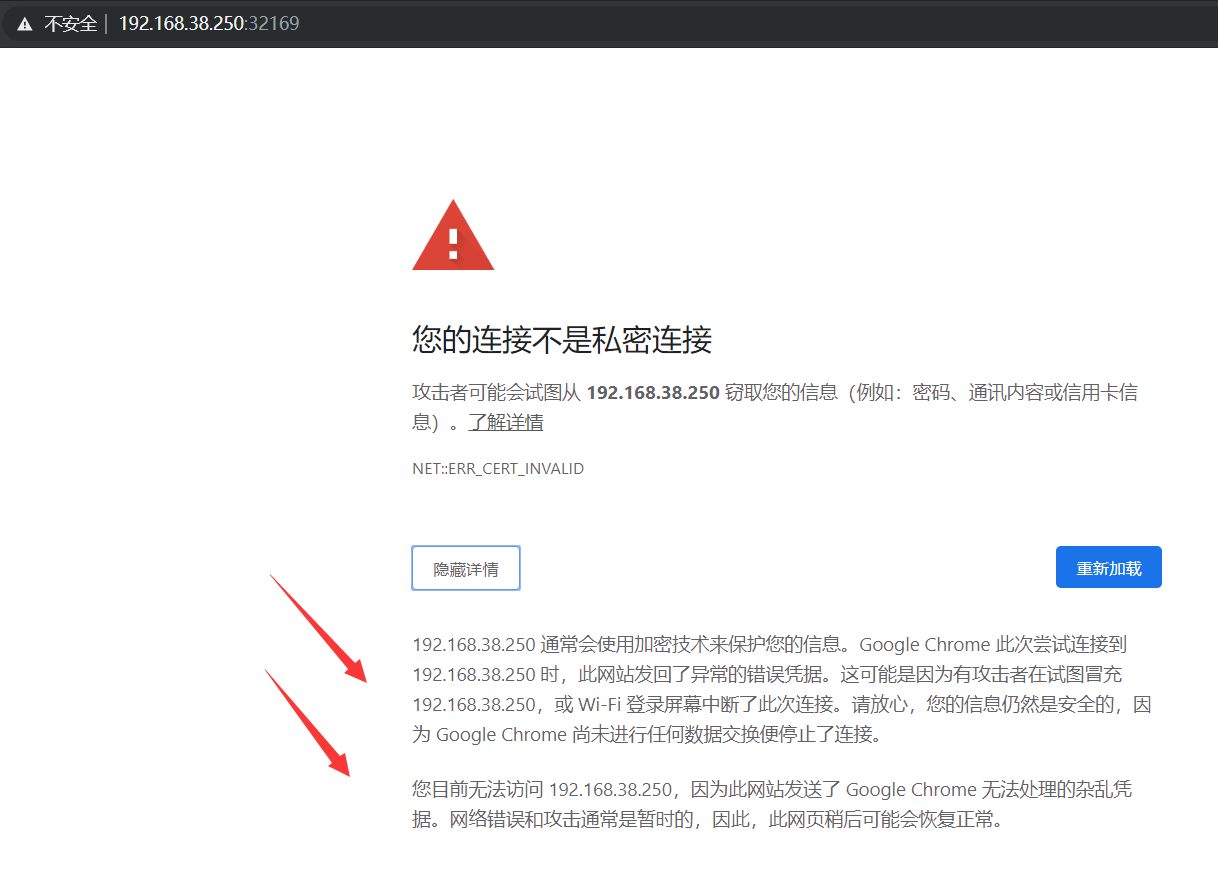
火狐浏览器可以:
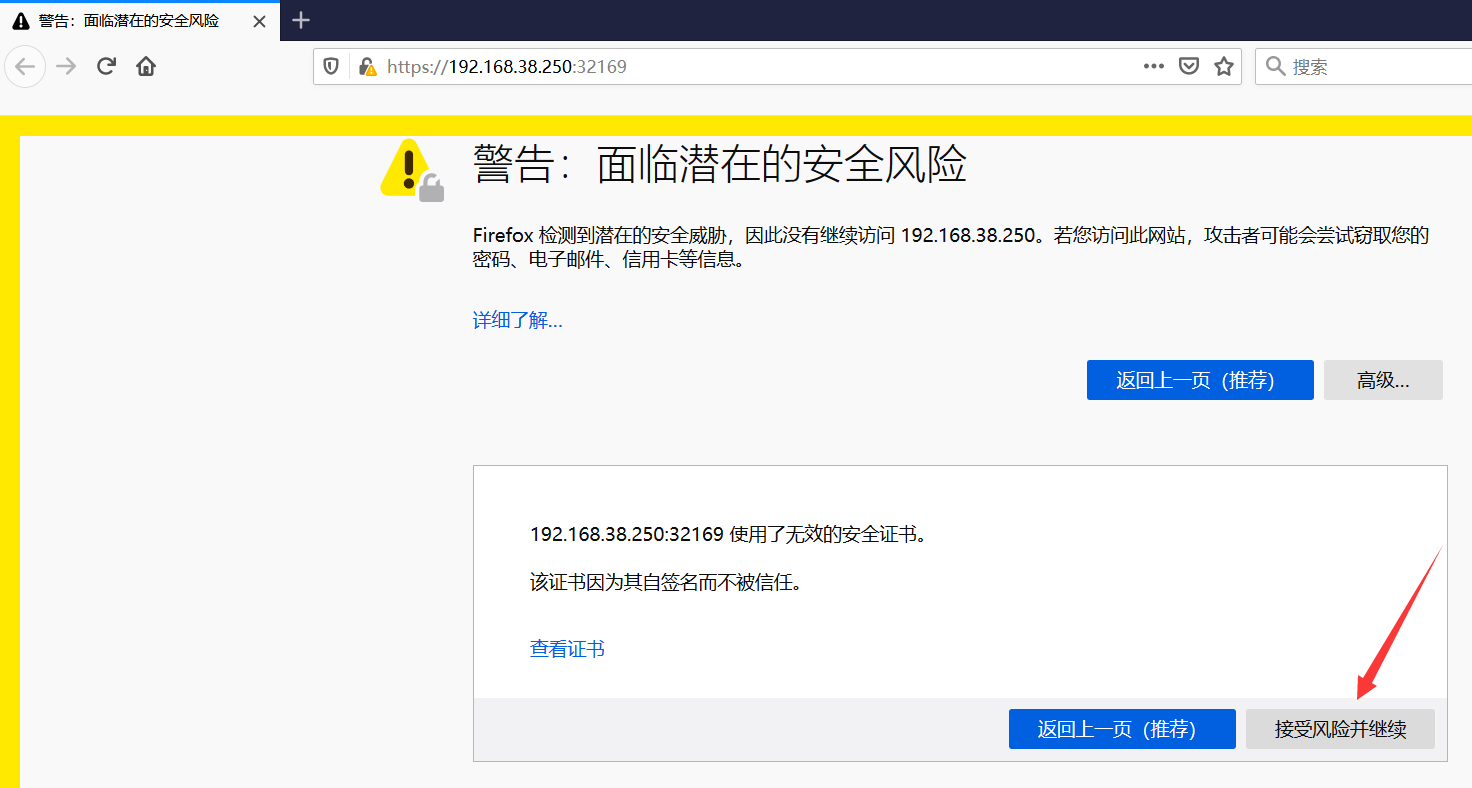
原因: dashboard1.7版本后,默认禁止了其他任何主机的请求,需要在部署时候提供证书以便与客户端建立进行通信时建立一个安全的HTTPS连接
解决办法:https://blog.51cto.com/10616534/2430512
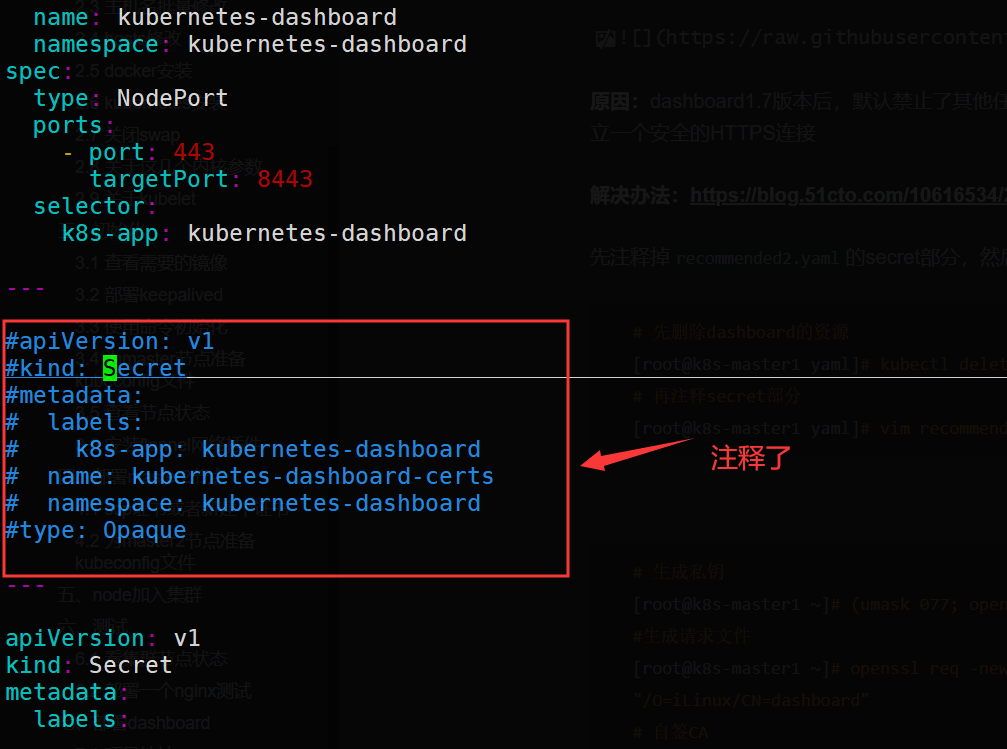
先注释掉recommended2.yaml的secret部分,然后手动生成secret
# 先删除dashboard的资源
[root@k8s-master1 yaml]# kubectl delete -f recommended2.yaml
# 再注释secret部分
[root@k8s-master1 yaml]# vim recommended2.yaml
# 重新生成dashboard
[root@k8s-master1 yaml]# kubectl apply -f recommended2.yaml
# 生成私钥
[root@k8s-master1 ~]# (umask 077; openssl genrsa -out dashboard.key 2048)
#生成请求文件
[root@k8s-master1 ~]# openssl req -new -key dashboard.key -out dashboard.csr -subj "/O=iLinux/CN=dashboard"
# 自签CA
[root@k8s-master1 ~]# openssl x509 -req -in dashboard.csr -CA /etc/kubernetes/pki/ca.crt \
-CAkey /etc/kubernetes/pki/ca.key -CAcreateserial -out dashboard.crt -days 3650
# 基于生成的私钥和证书文件创建名为kubernetes-dashboard-certs的Opaque类型的Secret对象,其键名为dashboard.key和dashboard.crt
[root@k8s-master1 ~]# kubectl create secret  generic kubernetes-dashboard-certs -n kubernetes-dashboard --from-file=dashboard.crt=./dashboard.crt --from-file=dashboard.key=./dashboard.key
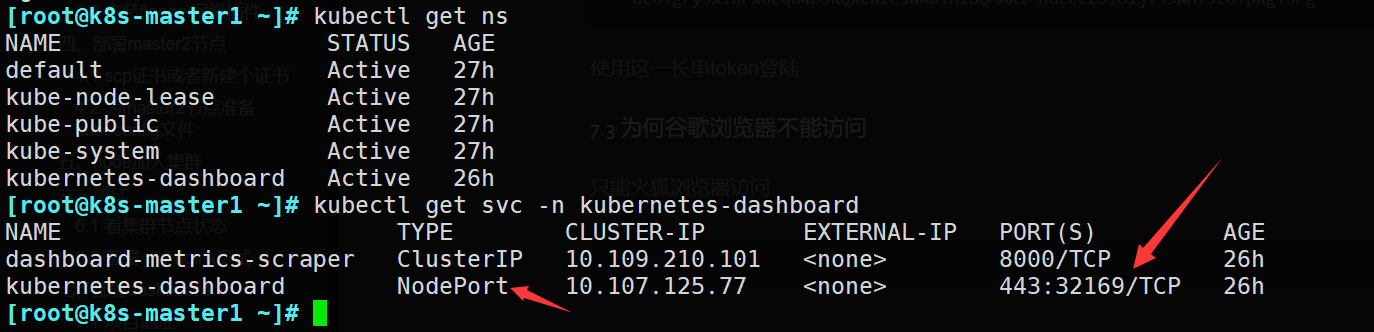
# 查看dashboard的名称空间
[root@k8s-master1 ~]# kubectl get ns
NAME                   STATUS   AGE
default                Active   28h
kube-node-lease        Active   28h
kube-public            Active   28h
kube-system            Active   28h
kubernetes-dashboard   Active   72s
# 查看dashboard的svc端口
[root@k8s-master1 ~]# kubectl get svc -n kubernetes-dashboard
NAME                        TYPE        CLUSTER-IP      EXTERNAL-IP   PORT(S)         AGE
dashboard-metrics-scraper   ClusterIP   10.108.49.54    <none>        8000/TCP        46s
kubernetes-dashboard        NodePort    10.99.201.217   <none>        443:31676/TCP   47s
# 获取token
[root@k8s-master1 ~]# kubectl -n kubernetes-dashboard describe secret $(kubectl -n kubernetes-dashboard get secret | grep admin-user | awk '{print $1}')