steamsv解锁流媒体的脚本
一、解锁流媒体什么意思
意思就是,很多vps本身看不了netflix,tvb,hulu,hbo等视频。因此就需要某种方法解锁。
那么为什么这些vps看不了这些视频呢:因为这些网站会对用户的ip检测,大部分情况下,只有原生的ip才可以观看,这些vps厂商的IP,绝大部分都被屏蔽掉了。
什么是原生IP:就是那种家用的宽带那种IP,比如我家是香港的,那么我拉了一条宽带,那么这条宽带就是原生的香港本土IP,看netflix,tvb当然没问题。
那么解锁的原理是什么:vps将netflix,tvb,hulu,hbo的流量转到可以观看这些视频的服务器上,steamsv就是专门提供这种服务器的厂商。
二、具体操作
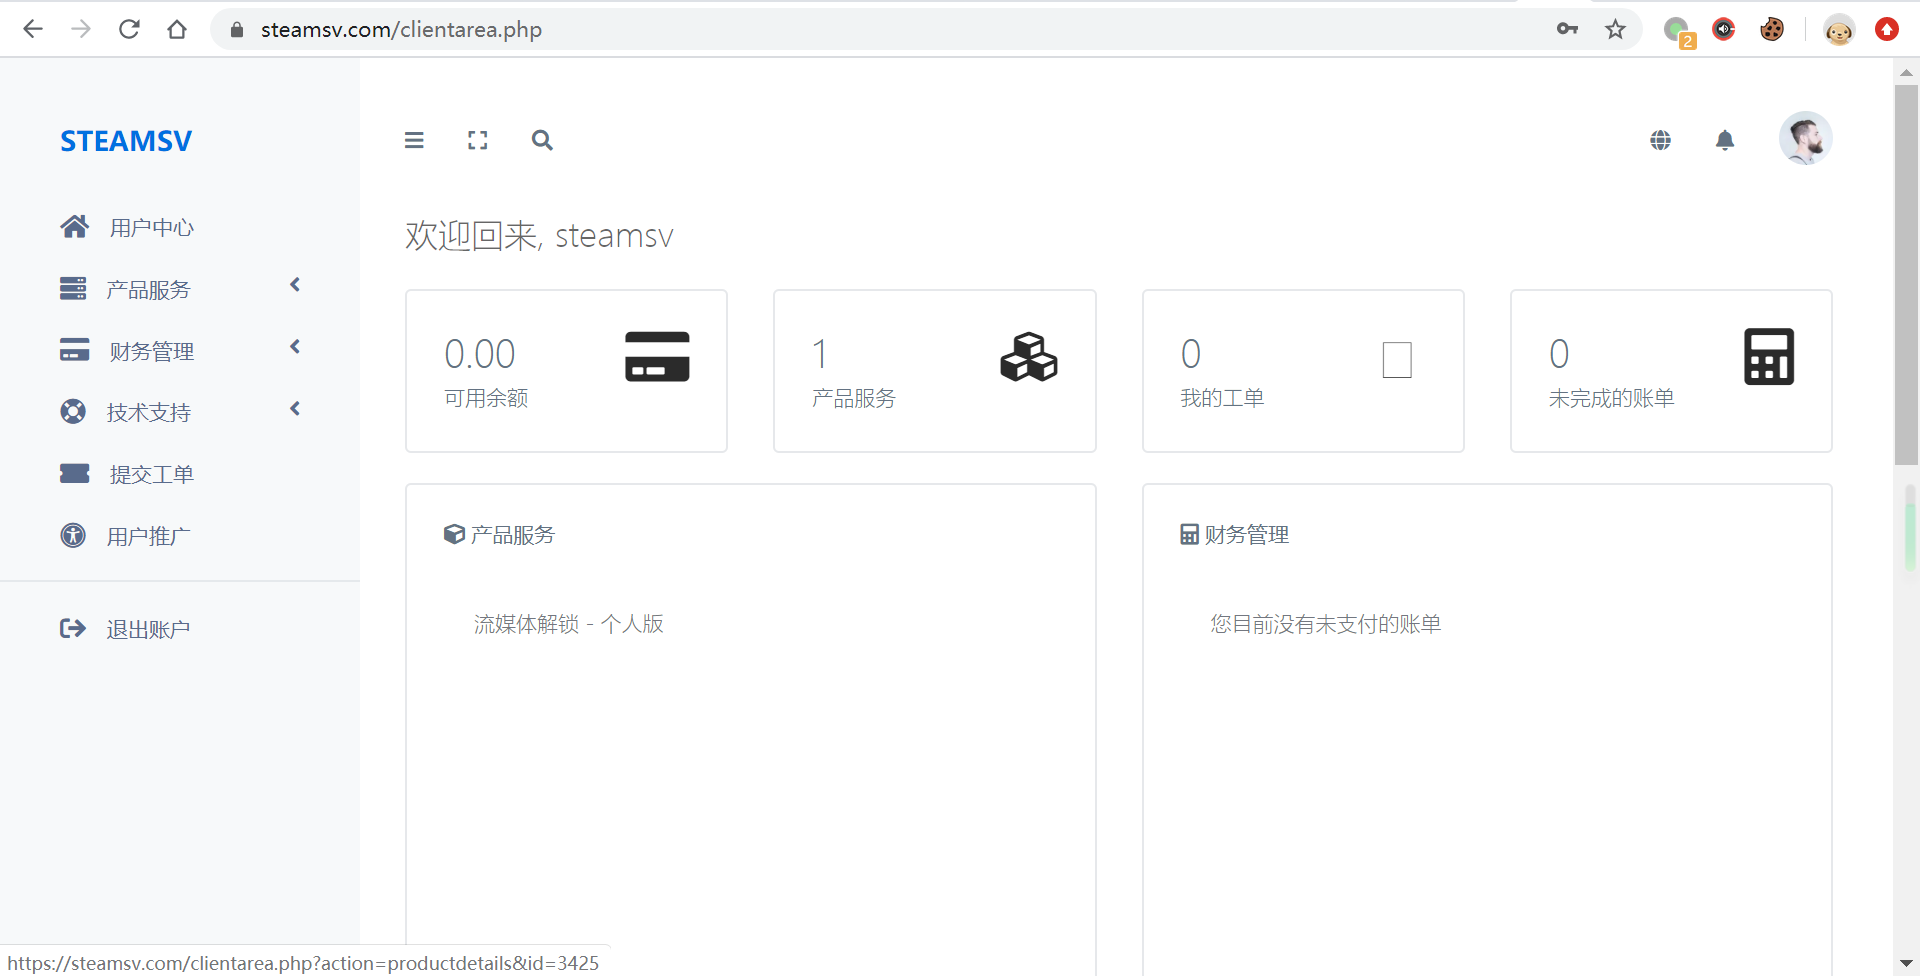
2.1、去steamsv注册账号
注册地址:https://steamsv.com/
产品文档:https://steamsv.wiki/introduce.html#
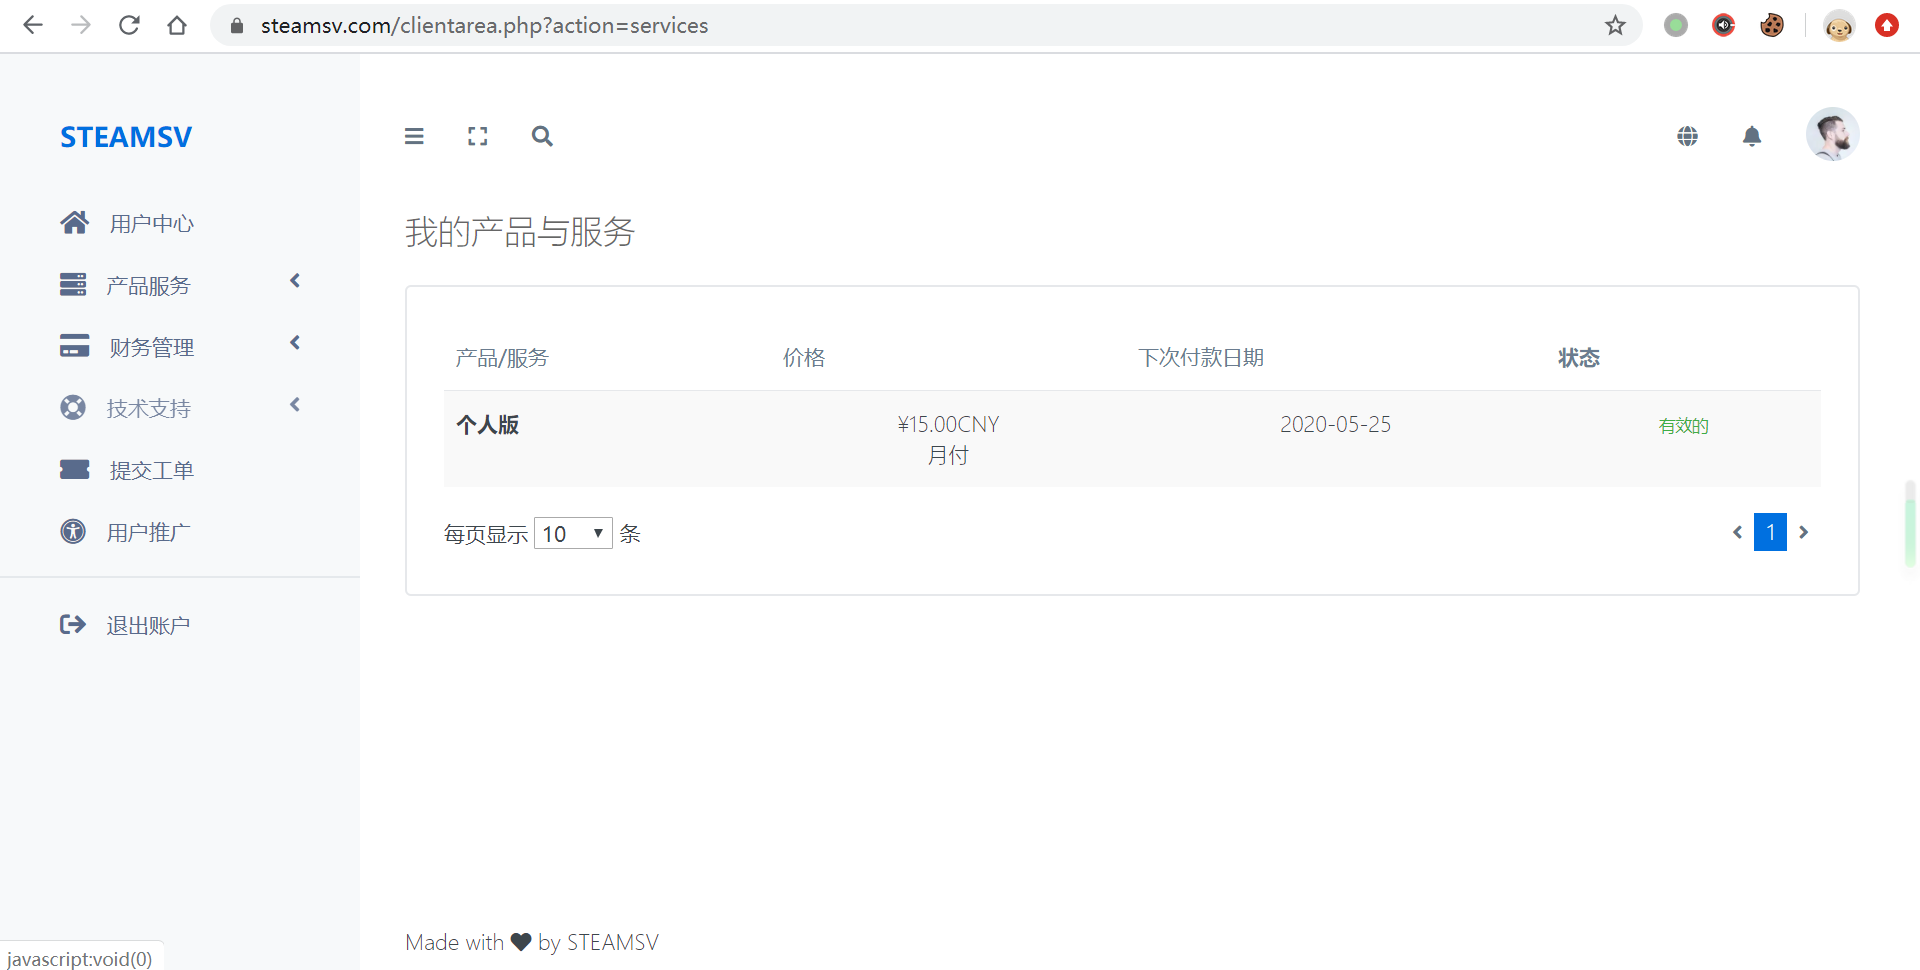
2.2、购买他们的服务
挺贵的,我买的15一月的
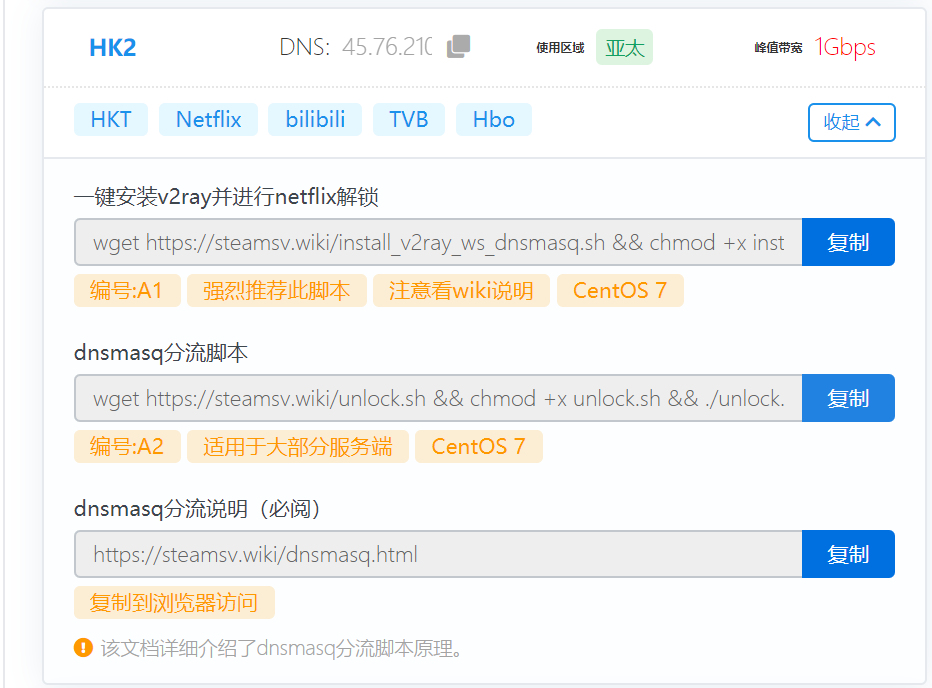
2.3、绑定自己的vpsIP

2.4、使用脚本部署即可
三、脚本说明:
3.1、一键安装v2ray并解锁netflix脚本
这个脚本实现自动安装v2ray并帮助配置好dnsmasq,这个对于小白有用,我不喜欢它配置的
可以看到安装dnsmasq这块,相当简单,install_dnsmasq函数里面就那么几行。首先安装dnsmasq,然后将resolv.conf的DNS改为127.0.0.1,然后编写dnsmasq子配置文件/etc/dnsmasq.d/unlock.conf 写入默认的DNS为8.8.8.8,奈飞域名的DNS为steamsv提供的IP,然后重启dnsmasq
root@hk2:/opt/steamsv# curl -sSL https://steamsv.wiki/install_v2ray_ws_dnsmasq.sh
#!/bin/bash

#fonts color
Green="\033[32m"
Red="\033[31m"
Yellow="\033[33m"
GreenBG="\033[42;37m"
RedBG="\033[41;37m"
Font="\033[0m"

if grep -Eqi "CentOS" /etc/issue || grep -Eq "CentOS" /etc/*-release; then
    echo ""
else
    echo "脚本目前仅支持Centos7"
    exit 1
fi

judge(){
    if [[ $? -eq 0 ]];then
        echo -e "${OK} ${GreenBG} $1 完成 ${Font}"
        sleep 1
    else
        echo -e "${Error} ${RedBG} $1 失败${Font}"
        exit 1
    fi
}

install_v2ray(){
    if [[ -d /root/v2ray ]];then
        rm -rf /root/v2ray
    fi
    if [[ -d /etc/v2ray ]];then
        rm -rf /etc/v2ray
    fi
    mkdir -p /root/v2ray && cd /root/v2ray
    wget -N --no-check-certificate https://install.direct/go.sh

    ## wget http://install.direct/go.sh

    if [[ -f go.sh ]];then
        bash go.sh --remove
        bash go.sh --force
        judge "安装 V2ray"
    else
        echo -e "${Error} ${RedBG} V2ray 安装文件下载失败,请检查下载地址是否可用 ${Font}"
        exit 4
    fi
    # 清除临时文件
    rm -rf /root/v2ray

    rm -f /etc/v2ray/config.json
    cat>/etc/v2ray/config.json<<EOF
{
    "inbound": {
        "allocate": {
            "strategy": "always"
        },
        "listen": "0.0.0.0",
        "port": 8090,
        "protocol": "vmess",
        "settings": {
            "clients": [
                {
                    "id" : "179c0060-9c92-3dd4-013a-aba0dbc39054",
                    "alterId" : 0
                }
            ],
            "udp": true
        },
        "sniffing": {
            "destOverride": [
                "http",
                "tls"
            ],
            "enabled": true
        },
        "streamSettings": {
            "network": "ws",
            "security": "auto",
            "wsSettings": {
                "connectionReuse": true,
                "path": "/v2ray/"
            }
        },
        "tag": "proxy"
    },
    "log": {
        "access": "/var/log/v2ray/access.log",
        "error": "/var/log/v2ray/error.log",
        "loglevel": "warning"
    },
    "outbound": {
        "protocol": "freedom",
        "settings": {}
    },
    "outboundDetour": [
        {
            "protocol": "blackhole",
            "settings": {
                "response": {
                    "type": "http"
                }
            },
            "tag": "blocked"
        }
    ],
    "routing": {
        "rules": [
            {
                "ip": [
                    "geoip:private"
                ],
                "outboundTag": "blocked",
                "type": "field"
            }
        ]
    }
}
EOF
systemctl restart v2ray
}

echo_v2ray(){
    echo "v2ray参数"
    local_ip=`curl -4 ip.sb`
    echo -e "服务器ip: ${local_ip}"
    echo "端口: 8090"
    echo "uuid: 179c0060-9c92-3dd4-013a-aba0dbc39054"
    echo "alterid: 0"
    echo "path: /v2ray/"
    echo "v2rayNG一键导入:"
    json=`echo "{\"add\":\"$local_ip\",\"aid\":\"0\",\"host\":\"\",\"id\":\"179c0060-9c92-3dd4-013a-aba0dbc39054\",\"net\":\"ws\",\"path\":\"/v2ray/\",\"port\":\"8090\",\"ps\":\"v2ray+dnsmasq\",\"tls\":\"\",\"type\":\"none\",\"v\":\"2\"}" | base64 | xargs`
    echo "vmess://$json"
}

uninstall_v2ray(){
    systemctl stop v2ray
    systemctl disable v2ray
    systemctl stop dnsmasq
    systemctl disable dnsmasq
    echo "nameserver 8.8.8.8" > /etc/resolv.conf
    echo "卸载成功"
}

install_dnsmasq(){
    yum install -y https://dl.fedoraproject.org/pub/epel/epel-release-latest-7.noarch.rpm
    yum install -y dnsmasq
    if [ $? -eq 0 ]; then
        read -p "请输入解锁dns:" dns
        systemctl enable dnsmasq
        rm -f /etc/resolv.conf
        echo "nameserver 127.0.0.1" > /etc/resolv.conf
        touch /etc/dnsmasq.d/unlock.conf
        echo "server=8.8.8.8" > /etc/dnsmasq.d/unlock.conf
        echo "server=8.8.4.4" >> /etc/dnsmasq.d/unlock.conf
        echo "server=/netflix.com/$dns" >> /etc/dnsmasq.d/unlock.conf
        echo "server=/netflix.net/$dns" >> /etc/dnsmasq.d/unlock.conf
        echo "server=/nflximg.net/$dns" >> /etc/dnsmasq.d/unlock.conf
        echo "server=/nflximg.com/$dns" >> /etc/dnsmasq.d/unlock.conf
        echo "server=/nflxvideo.net/$dns" >> /etc/dnsmasq.d/unlock.conf
        echo "server=/nflxso.net/$dns" >> /etc/dnsmasq.d/unlock.conf
        echo "server=/nflxext.com/$dns" >> /etc/dnsmasq.d/unlock.conf

        systemctl restart dnsmasq
        systemctl status dnsmasq
        echo "dnsmasq启动成功"
    else
        echo "dnsmasq安装失败, 请检查仓库状况"
    fi
}

menu(){
    echo -e " V2ray|Trojan dnsmasq奈飞解锁安装管理脚本 ${Red}[${shell_version}]${Font}"
    echo -e "${Green}1.${Font}  安装 v2ray+dnsmasq"
    echo -e "${Green}2.${Font}  卸载 v2ray+dnsmasq"
    echo -e "${Green}3.${Font}  退出 \n"
    read -p "请输入数字:" menu_num
    case $menu_num in
        1)
          install_v2ray
          install_dnsmasq
          echo_v2ray
          ;;
        2)
          uninstall_v2ray
          ;;
        3)
          exit 0
          ;;
        *)
          echo -e "${RedBG}请输入正确的数字${Font}"
          ;;
    esac
}

menu
3.2、dnsmasq分流脚本
这个脚本就是一个单独的安装dnsmasq脚本
判断当前系统是ubuntu,centos,deabian,然后执行相应的安装命令,也很简单
root@hk2:/opt/steamsv# curl -sSL https://steamsv.wiki/unlock.sh
#!/bin/bash

if grep -Eqi "CentOS" /etc/issue || grep -Eq "CentOS" /etc/*-release; then
    yum install -y https://dl.fedoraproject.org/pub/epel/epel-release-latest-7.noarch.rpm
    yum install bind-utils
    yum install -y dnsmasq
elif grep -Eqi "Debian" /etc/issue || grep -Eq "Debian" /etc/*-release; then
    apt-get update
    apt-get install dnsutils
    apt install -y dnsmasq
elif grep -Eqi "Ubuntu" /etc/issue || grep -Eq "Ubuntu" /etc/*-release; then
    apt-get update
    apt-get install dnsutils
    apt install -y dnsmasq
else
    echo "This script only supports CentOS, Ubuntu and Debian."
    exit 1
fi

if [ $? -eq 0 ]; then
    systemctl enable dnsmasq
    rm -f /etc/resolv.conf
    echo "nameserver 127.0.0.1" > /etc/resolv.conf
    touch /etc/dnsmasq.d/unlock.conf
    echo "server=8.8.8.8" > /etc/dnsmasq.d/unlock.conf
    echo "server=8.8.4.4" >> /etc/dnsmasq.d/unlock.conf
    echo "server=/netflix.com/$1" >> /etc/dnsmasq.d/unlock.conf
    echo "server=/netflix.net/$1" >> /etc/dnsmasq.d/unlock.conf
    echo "server=/nflximg.net/$1" >> /etc/dnsmasq.d/unlock.conf
    echo "server=/nflximg.com/$1" >> /etc/dnsmasq.d/unlock.conf
    echo "server=/nflxvideo.net/$1" >> /etc/dnsmasq.d/unlock.conf
    echo "server=/nflxso.net/$1" >> /etc/dnsmasq.d/unlock.conf
    echo "server=/nflxext.com/$1" >> /etc/dnsmasq.d/unlock.conf

    systemctl restart dnsmasq
    echo "dnsmasq启动成功"
else
    echo "dnsmasq安装失败, 请检查仓库状况"
fi
四、v2ray自带dns功能
可惜我失败了,不知道咋回事
  ......
  "stats": {},
  "dns": {
      "servers": [
          {
              "address": "38.147.165.232",
              "port": 53,
              "domains": [
                  "domain:netflix.com",
                  "domain:netflix.net",
                  "domain:nflximg.net",
                  "domain:nflxvideo.net",
                  "domain:nflxso.net",
                  "domain:nflxext.com",
		  "mytvsuper.com",
		  "tvb.com"
              ]
          },
          "localhost"
      ]
  },
  "inbounds": [
  ......
五、alpine镜像安装dnsmasq
#安装dnsmasq
bash-5.0# apk add dnsmasq
#修改配置文件
bash-5.0# cat /etc/resolv.conf
nameserver 127.0.0.1
#修改配置文件
bash-5.0# cat /etc/dnsmasq.conf
server=8.8.8.8
server=8.8.4.4
server=/netflix.com/45.32.251.125
server=/netflix.net/45.32.251.125
server=/nflximg.net/45.32.251.125
server=/nflximg.com/45.32.251.125
server=/nflxvideo.net/45.32.251.125
server=/nflxso.net/45.32.251.125
server=/nflxext.com/45.32.251.125
server=/mytvsuper.com/45.32.251.125
server=/tvb.com/45.32.251.125
server=/hbo.com/45.32.251.125
server=/hbogoasia.hk/45.32.251.125
server=/hbogo.com/45.32.251.125
server=/hbonow.com/45.32.251.125
server=/hboasia.com/45.32.251.125
server=/amazonaws.com/45.32.251.125
server=/tvb.com/45.32.251.125
server=/tvb.com/45.32.251.125
server=/tvb.com/45.32.251.125
#启动dnsmasq服务
dnsmasq -C /etc/dnsmasq.conf
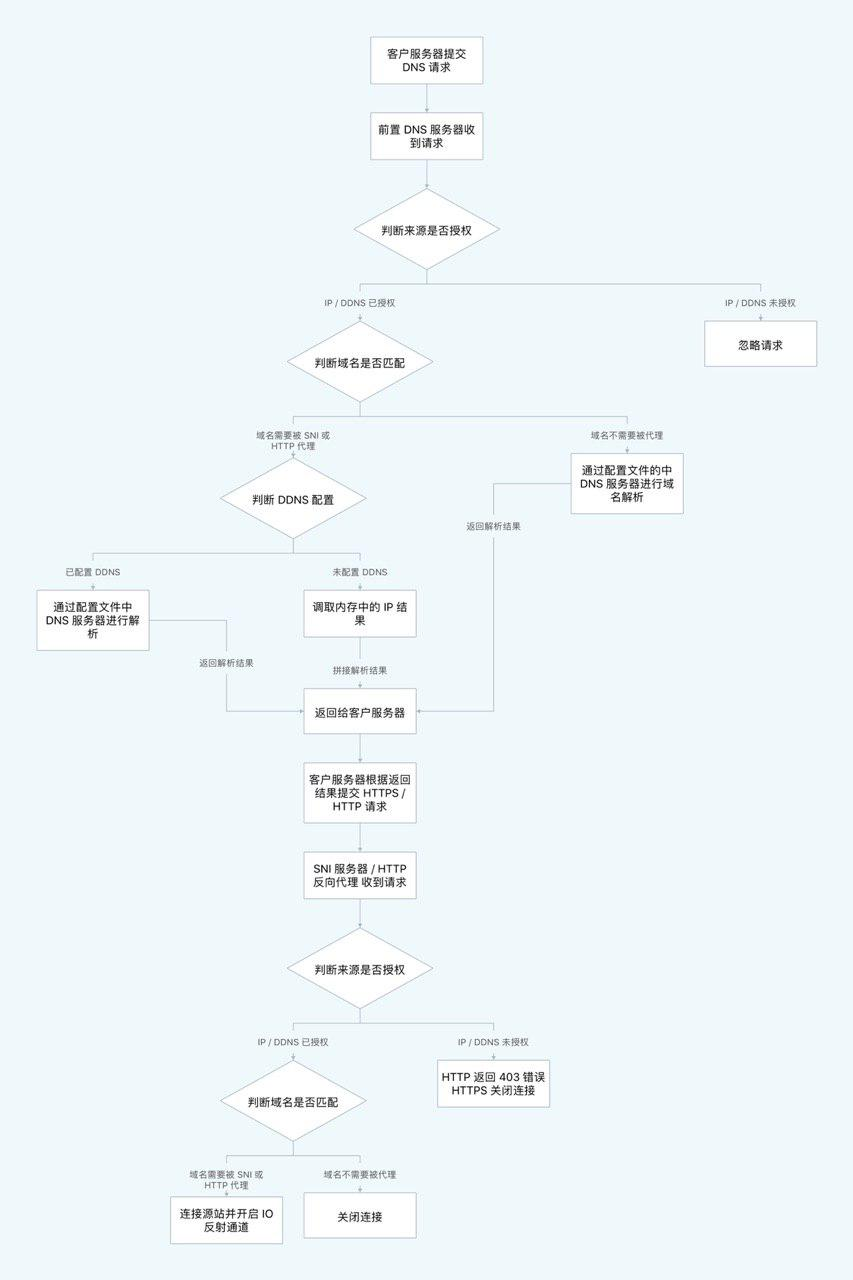
六、staemsv实现原理图
七、各流媒体域名规则
#Netflix
netflix.com
netflix.net
nflximg.net
nflximg.com
nflxvideo.net
nflxso.net
nflxext.com

#Spotify
scdn.co
spotify.com
spoti.fi

#Hulu
hulu.com
huluim.com

#ABC
abc.com

#HBO
hbo.com
hbogoasia.hk
hbogo.com
hbonow.com
hboasia.com
amazonaws.com

#Amazon
amazon.com
amazon.co.uk
amazonvideo.com

#Disney
disney.com
disneyjunior.com
disneyplus.com
disney-plus.net
dssott.com
bamgrid.com
amazonaws.com
go.com
starwave.com

#TVB
mytvsuper.com
tvb.com

#bilibili
bilibili.com

#动画疯
gamer-cds.cdn.hinet.net
gamer2-cds.cdn.hinet.net
gamer.com.tw
i2.bahamut.com.tw
app-measurement.com

#Line
lin.ee
line.me
linenaver.jp
line-apps.com
line-cdn.net
line-scdn.net
linetv.tw
cloudfront.net

#Fox+
fox.com
foxdng.com
foxnow.com
foxplus.com
foxplay.com

#BBC
bbc.co
bbc.com
co.uk
llnwd.net
akamaized.net
[x]