Cobbler批量自动化部署CentOS/Ubuntu/Windows
参考:https://anjia0532.github.io/2019/02/22/cobbler/
参考:https://cobbler.readthedocs.io/en/latest/
参考:https://blog.51cto.com/14012942/2436394
本文通过在VMware上创建最小CentOS系统并部署cobbler,最终实现cobbler安装ubuuntu/CentOS7/win10系统
这篇文章主要是对之前文章的补充,之前cobbler无法安装ubuntu和windows
一、准备
vmware虚拟机,并且安装好centos7.6.1810,网咯模式为桥接。
二、虚拟机基本优化
- 关闭selinux
- 关闭firewalld
- 替换yum源为阿里云或者华为云
- ssh优化
三、安装cobbler
3.1 安装依赖软件
yum -y install cobbler cobbler-web pykickstart debmirror httpd dhcp
3.2 设置开机启动
systemctl enable cobblerd dhcpd httpd tftp rsyncd
3.3 启动服务
systemctl start httpd
systemctl start cobblerd tftp rsyncd
3.4 检查配置
[root@node1 ~]# cobbler check
The following are potential configuration items that you may want to fix:

1 : The 'server' field in /etc/cobbler/settings must be set to something other than localhost, or kickstarting features will not work.  This should be a resolvable hostname or IP for the boot server as reachable by all machines that will use it.
2 : For PXE to be functional, the 'next_server' field in /etc/cobbler/settings must be set to something other than 127.0.0.1, and should match the IP of the boot server on the PXE network.
3 : change 'disable' to 'no' in /etc/xinetd.d/tftp
4 : Some network boot-loaders are missing from /var/lib/cobbler/loaders, you may run 'cobbler get-loaders' to download them, or, if you only want to handle x86/x86_64 netbooting, you may ensure that you have installed a *recent* version of the syslinux package installed and can ignore this message entirely.  Files in this directory, should you want to support all architectures, should include pxelinux.0, menu.c32, elilo.efi, and yaboot. The 'cobbler get-loaders' command is the easiest way to resolve these requirements.
5 : comment out 'dists' on /etc/debmirror.conf for proper debian support
6 : comment out 'arches' on /etc/debmirror.conf for proper debian support
7 : The default password used by the sample templates for newly installed machines (default_password_crypted in /etc/cobbler/settings) is still set to 'cobbler' and should be changed, try: "openssl passwd -1 -salt 'random-phrase-here' 'your-password-here'" to generate new one
8 : fencing tools were not found, and are required to use the (optional) power management features. install cman or fence-agents to use them

Restart cobblerd and then run 'cobbler sync' to apply changes.
3.5 解决第一个问题
设置server服务器地址
sed -r '/^next_server/s/^.*$/next_server: 172.18.1.244/' /etc/cobbler/settings -i
3.6 解决第二个问题
next_server要设置为本机IP
sed -ri '/^server/s/^.*$/server: 172.18.1.244/' /etc/cobbler/settings
3.7 解决第三个问题
开启tftp
sed -ri '/disable/s/yes/no/' /etc/xinetd.d/tftp
systemctl restart tftp
3.8 解决第四个问题
下载bootloader
cobbler get-loaders
3.9 解决第五第六个问题
注释掉/etc/debmirror.conf中相关项即可。
sed -ri '/^@arches/s/^/#/' /etc/debmirror.conf
sed -ri '/^@dists/s/^/#/' /etc/debmirror.conf
3.10 解决第七个问题
生成随机密码。这里手动改下
[root@node1 ~]# openssl passwd -1 -salt `openssl rand -hex 8` '123456'
$1$bfa5227e$eg4b8n63FN1YKOg62PPnt1
[root@node1 ~]# vim /etc/cobbler/settings
[root@node1 ~]# grep ^default_password_crypted /etc/cobbler/settings
default_password_crypted: "$1$bfa5227e$eg4b8n63FN1YKOg62PPnt1"
第8个问题:电源管理模块(非必选),cman和ence-agents二选一即可,此处忽略
3.11 cobbler sync同步
然后再次检查
[root@node1 ~]# cobbler sync
[root@node1 ~]# systemctl restart cobblerd   #必须要重启,因为改cobbler配置了
[root@node1 ~]# systemctl restart tftp      #tftp也修改过了
[root@node1 ~]# cobbler check
The following are potential configuration items that you may want to fix:
1 : fencing tools were not found, and are required to use the (optional) power management features. install cman or fence-agents to use them
四、配置dhcpd
默认cobbler是不管理dhcpd的;/etc/cobbler/settings文件中manage_dhcp设置为0
因此此处自己配置dhcpd服务
[root@node1 ~]# cat > /etc/dhcp/dhcpd.conf <<EOF
ddns-update-style none;
default-lease-time 259200;
max-lease-time 518400;
subnet 172.18.0.0 netmask 255.255.0.0 {
        range 172.18.88.200 172.18.88.240;
        option subnet-mask 255.255.0.0;
        option routers 172.18.0.1;
        option domain-name-servers 180.76.76.76;
        next-server 172.18.1.244;
        filename "pxelinux.0";
}
EOF
[root@node1 ~]# systemctl restart dhcpd
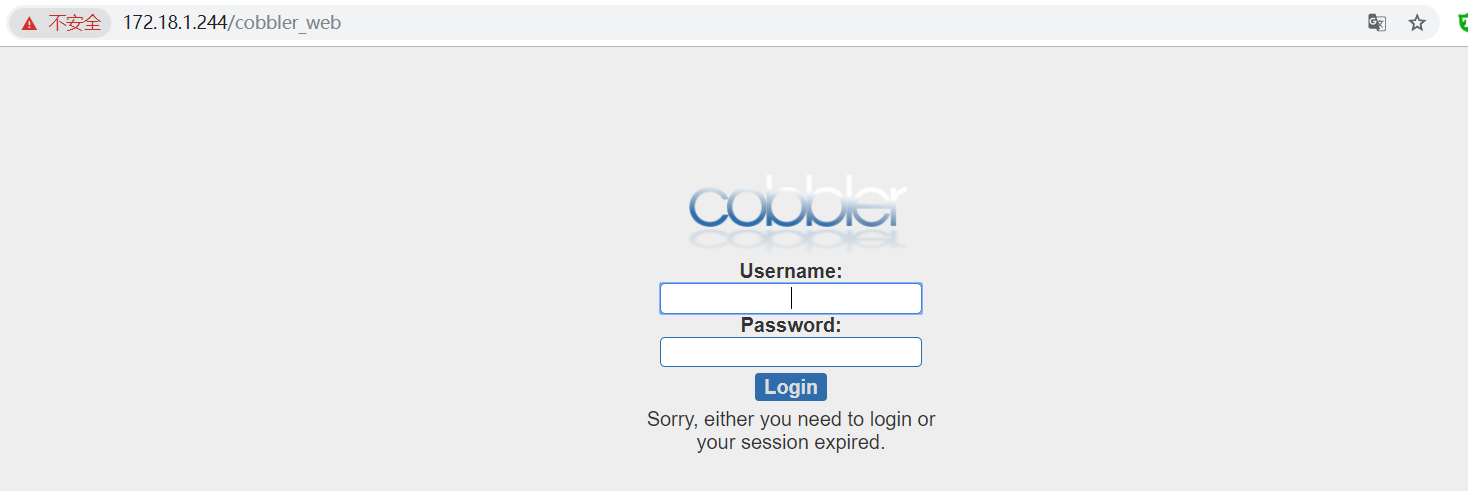
五、打开cobblerweb界面
https://172.18.1.244/cobbler_web
cobbler_web2.8.5有bug,web界面打不开,原因django版本过高
应该修复了,cobbler-web2.8.5配合django-1.11.26是可以运行的
不行的话参考https://blog.51cto.com/14012942/2436569
5.1 设置密码
默认用户名密码为cobbler
[root@node1 ~]# egrep -v "^$|#" /etc/cobbler/users.conf
[admins]
admin = ""
cobbler = ""
[root@node1 ~]# cat /etc/cobbler/users.digest
cobbler:Cobbler:a2d6bae81669d707b72c0bd9806e01f3
# 设置新用户
# htdigest + 配置文件 + “描述信息” + 用户
[root@node1 ~]# htdigest -c /etc/cobbler/users.digest Cobbler test1
New password:
Re-type new password:
[root@node1 ~]# cat /etc/cobbler/users.digest
test1:Cobbler:df2c4de1de7381dfaf7453adfc1bea88
3

六、生成centos7的distro
从本地导入的过程实际上是将系统镜像中的文件复制到/var/www/cobbler/目录(默认)下。
[root@node1 ~]# ls /mnt
CentOS_BuildTag  EULA  images    LiveOS    repodata              RPM-GPG-KEY-CentOS-Testing-7
EFI              GPL   isolinux  Packages  RPM-GPG-KEY-CentOS-7  TRANS.TBL
[root@node1 ~]# cobbler import --name=CentOS7.6-mini --path=/mnt
等待导入完成,则表示distro生成完成。
[root@node1 ~]# ls /var/www/cobbler/images/CentOS7.6-mini-x86_64/
initrd.img vmlinuz
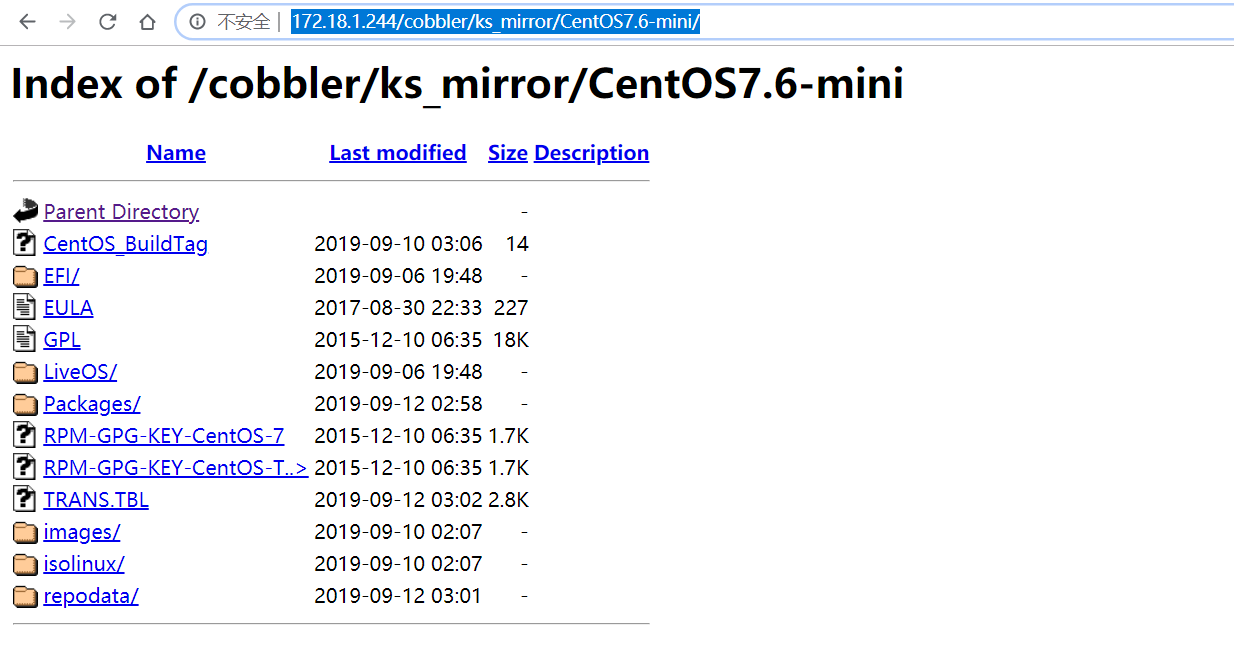
[root@node1 ~]# ls /var/www/cobbler/ks_mirror/CentOS7.6-mini/ #完全来自于镜像
CentOS_BuildTag EULA images LiveOS repodata RPM-GPG-KEY-CentOS-Testing-7
EFI GPL isolinux Packages RPM-GPG-KEY-CentOS-7 TRANS.TBL
此时http://172.18.1.244/cobbler/ks_mirror/CentOS7.6-mini/是可以访问的
6.1 提供kickstart文件
[root@node1 ~]# cat  /var/lib/cobbler/kickstarts/CentOS7.7-mini.ks
#version=DEVEL
# System authorization information
auth --enableshadow --passalgo=sha512
# Install OS instead of upgrade
install
# Use network installation
url --url="http://172.18.1.244/cobbler/ks_mirror/CentOS7.6-mini/"
# Use text mode install
text
# Firewall configuration
firewall --disabled
firstboot --disable
# ignoredisk --only-use=sda
# Keyboard layouts
# old format: keyboard us
# new format:
keyboard --vckeymap=us --xlayouts='us'
# System language
lang en_US.UTF-8

# Network information
network  --onboot=yes --bootproto=dhcp --device=eth0 --noipv6
network  --hostname=CentOS7
# Reboot after installation
reboot
# Root password
rootpw --iscrypted $6$TwMc7kHxAYSdICBU$yUVPcTo.SWi6FpWrZsx3.X.yjbrvqvgMxu0Jvqims55ZU6hQKPaR5DeQISwhcMBkmyVK/UJ1SFnpmu9E3S/Wu0
# SELinux configuration
selinux --disabled
# Do not configure the X Window System
skipx
# System timezone
timezone Asia/Shanghai
# System bootloader configuration
#bootloader --append="quiet crashkernel=auto" --location=mbr --boot-drive=sda
bootloader --append="net.ifnames=0" --location=mbr
# Clear the Master Boot Record
zerombr
# Partition clearing information
clearpart --all --initlabel
# Disk partitioning information
part /boot --asprimary --fstype="xfs" --size=250
part swap --fstype="swap" --size=2000
part / --asprimary --fstype="xfs" --grow --size=5000

# part /boot --fstype ext4 --size=100
# part swap --fstype=swap --size=2048
# part pv26 --size=100 --grow
# volgroup VG00 --pesize=32768 pv26
# logvol / --fstype ext4 --name=LVroot --vgname=VG00 --size=29984
# logvol /data --fstype ext4 --name=LVdata --vgname=VG00 --size=100 --grow

%post
curl -sLo /root/reset.sh https://gitee.com/uscwifi/scripts/raw/master/reset4.0-test.sh
/bin/bash /root/reset.sh
%end

%packages
%end

%addon com_redhat_kdump --enable --reserve-mb='auto'

%end
#检测ks文件有木有问题
[root@node1 ~]# ksvalidator /var/lib/cobbler/kickstarts/CentOS7.7-mini.ks
6.2 提供profile
在导入镜像生成distro的过程中,会自动生成一个profile。
[root@node1 ~]#  cobbler profile list
   CentOS7.6-mini-x86_64
该profile默认使用的kickstart是/var/lib/cobbler/kickstarts/sample_end.ks,所以需要修改此项。
[root@node1 ~]# cobbler profile report  CentOS7.6-mini-x86_64
Name                           : CentOS7.6-mini-x86_64
TFTP Boot Files                : {}
Comment                        :
DHCP Tag                       : default
Distribution                   : CentOS7.6-mini-x86_64
Enable gPXE?                   : 0
Enable PXE Menu?               : 1
Fetchable Files                : {}
Kernel Options                 : {}
Kernel Options (Post Install)  : {}
Kickstart                      : /var/lib/cobbler/kickstarts/sample_end.ks
Kickstart Metadata             : {}
Management Classes             : []
Management Parameters          : <<inherit>>
Name Servers                   : []
Name Servers Search Path       : []
Owners                         : ['admin']
Parent Profile                 :
Internal proxy                 :
Red Hat Management Key         : <<inherit>>
Red Hat Management Server      : <<inherit>>
Repos                          : []
Server Override                : <<inherit>>
Template Files                 : {}
Virt Auto Boot                 : 1
Virt Bridge                    : xenbr0
Virt CPUs                      : 1
Virt Disk Driver Type          : raw
Virt File Size(GB)             : 5
Virt Path                      :
Virt RAM (MB)                  : 512
Virt Type                      : kvm
此处删除这个profile,重新生成
[root@node1 ~]# cobbler profile remove --name=CentOS7.6-mini-x86_64
[root@node1 ~]# cobbler profile add --name=CentOS7.7-mini-x86_64 --distro=CentOS7.6-mini-x86_64  --kickstart=/var/lib/cobbler/kickstarts/CentOS7.7-mini.ks
[root@node1 ~]#  cobbler profile list
   CentOS7.7-mini-x86_64
实际上,每添加一个profile都是在向/var/lib/tftpboot/pxelinux.cfg/default中添加一个label。
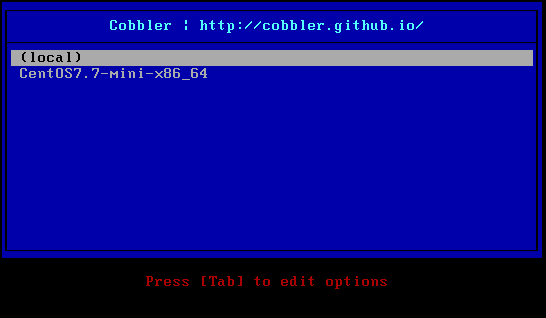
[root@node1 ~]# cat /var/lib/tftpboot/pxelinux.cfg/default
DEFAULT menu
PROMPT 0
MENU TITLE Cobbler | http://cobbler.github.io/
TIMEOUT 200
TOTALTIMEOUT 6000
ONTIMEOUT local

LABEL local
        MENU LABEL (local)
        MENU DEFAULT
        LOCALBOOT -1

LABEL CentOS7.7-mini-x86_64
        kernel /images/CentOS7.6-mini-x86_64/vmlinuz
        MENU LABEL CentOS7.7-mini-x86_64
        append initrd=/images/CentOS7.6-mini-x86_64/initrd.img ksdevice=bootif lang=  kssendmac text  ks=http://172.18.1.244/cblr/svc/op/ks/profile/CentOS7.7-mini-x86_64
        ipappend 2


MENU end
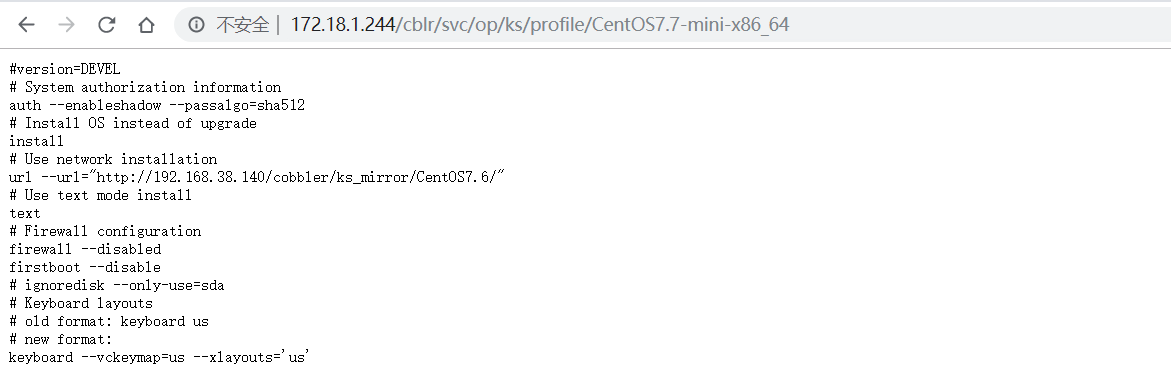
测试上面的url可以访问:http://172.18.1.244/cblr/svc/op/ks/profile/CentOS7.7-mini-x86_64
七、测试安装centos系统
新建个虚拟机,桥接网卡测试
八、生成ubuntu的distro
我觉得可以参考这篇文章:https://blog.51cto.com/juestnow/2444873?source=dra 他的文章内容我还没有测试
使用ubuntu18.04
8.1 生成distro
[root@node1 ~]# ls /mnt
boot  casper  dists  EFI  install  isolinux  md5sum.txt  pics  pool  preseed  README.diskdefines  ubuntu
[root@node1 ~]# cobbler import --name=ubuntu18.04-mini --path=/mnt --arch=x86_64
第一次报错了。和之前一样
但第二天同样的操作(挂载光盘,导入),就成功了,我也是醉了这次导入的是ubuntu16.04,搞错了,这一步证明了ubuntu16.04没问题
[root@node1 mnt]# cobbler import --name=ubuntu18.04-mini --path=/mnt --arch=x86_64
#不知道为啥显示两个
[root@node1 mnt]# cobbler distro list
   CentOS7.6-mini-x86_64
   ubuntu18.04-mini-hwe-x86_64
   ubuntu18.04-mini-x86_64
https://github.com/imooc-courses/cobbler/issues/2
通过cobbler profile report对比,发现两个profile其实一样,那我机删掉一个
[root@node1 ~]# cobbler profile report --name ubuntu18.04-mini-hwe-x86_64 > 1.txt
[root@node1 ~]# cobbler profile report --name ubuntu18.04-mini-x86_64 > 2.txt
[root@node1 ~]# diff 1.txt 2.txt
[root@node1 ~]# cobbler profile remove --name ubuntu18.04-mini-hwe-x86_64
[root@node1 ~]# cobbler distro remove --name ubuntu18.04-mini-hwe-x86_64
说明:此时新建虚拟机,这个Ubuntu是可以安装成功的!,但我并不知道密码是什么,因为我压根没设置密码
最终我按照这个帖子,复意识到镜像不对,阿里云,华为云下载的镜像18.04.3都是带live的,大小是848MB,而官网的不带live,是900M
https://github.com/cobbler/cobbler/issues/1905
[root@node1 ~]# du -sh /opt/ubuntu-18.04.3-live-server-amd64.iso
848M	/opt/ubuntu-18.04.3-live-server-amd64.iso
[root@node1 opt]# du -sh /opt/ubuntu-18.04.3-server-amd64.iso
900M	/opt/ubuntu-18.04.3-server-amd64.iso
最后
ubuntu-18.04.3-live-server-amd64.iso -> vmware光驱挂载 -> 不行
ubuntu-18.04.3-live-server-amd64.iso -> 虚拟机里面loop设备挂载 -> 不行
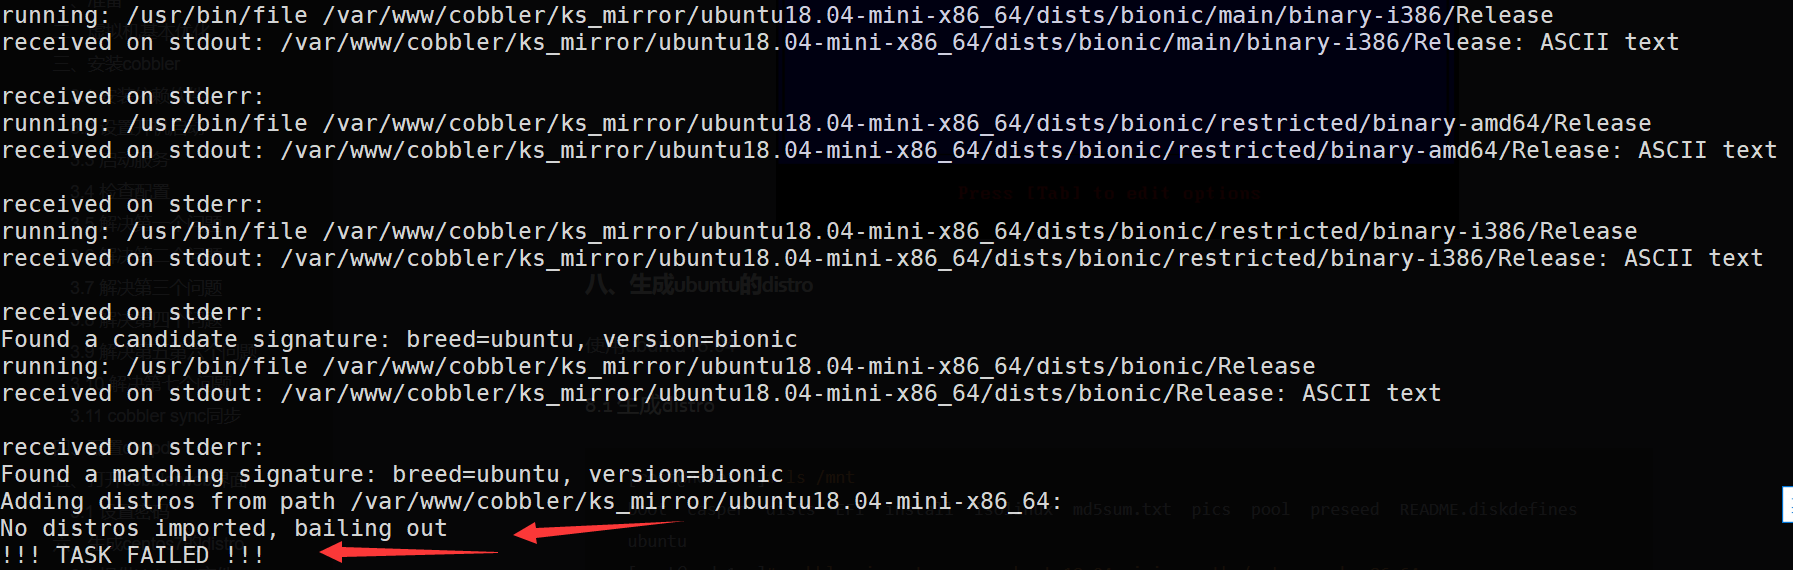
ubuntu-18.04.3-server-amd64.iso -> 虚拟机光驱挂载 -> 不行,报下面这个错误
[root@node1 ~]# cobbler import --name=ubuntu18.04-mini --path=/mnt --arch=x86_64
task started: 2019-12-06_175510_import
task started (id=Media import, time=Fri Dec  6 17:55:10 2019)
Exception occured: <class 'cobbler.cexceptions.CX'>
Exception value: 'Command failed'
Exception Info:
  File "/usr/lib/python2.7/site-packages/cobbler/remote.py", line 82, in run
    rc = self._run(self)
   File "/usr/lib/python2.7/site-packages/cobbler/remote.py", line 227, in runner
    self.logger
   File "/usr/lib/python2.7/site-packages/cobbler/api.py", line 876, in import_tree
    utils.run_this(rsync_cmd, (spacer, mirror_url, path), self.logger)
   File "/usr/lib/python2.7/site-packages/cobbler/utils.py", line 899, in run_this
    die(logger,"Command failed")
   File "/usr/lib/python2.7/site-packages/cobbler/utils.py", line 114, in die
    raise CX(msg)

!!! TASK FAILED !!!
ubuntu-18.04.3-server-amd64.iso -> 虚拟机光驱挂载 -> 导入成功
新错误:安装不上ntp报错:
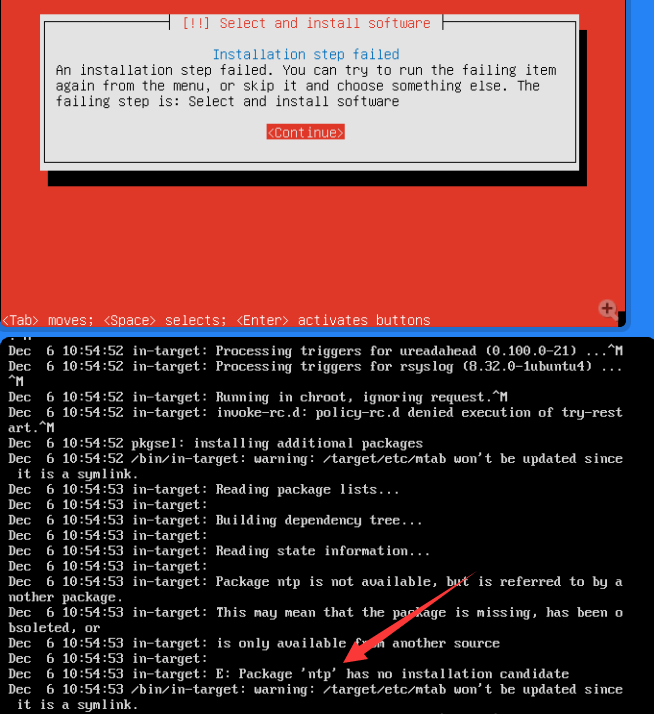
解决办法:不装软件,最后装好系统再弄
#修改 /var/lib/cobbler/kickstarts/sample.seed  整行注释
# d-i pkgsel/include string ntp ssh wget
解决办法二:直接用网络源吧测试不可行
# 大约34行那里  修改完记得cobbler sync,不要问为啥
 34 # Setup the installation source
 35 d-i mirror/country string manual
 36 d-i mirror/http/hostname string mirrors.huaweicloud.com
 37 d-i mirror/http/directory string /ubuntu
 38 d-i mirror/http/proxy string

 123 d-i pkgsel/include string ntp ssh wget vim lrzsz screen bc tree
如何设置密码
# 如果设置root密码,设置的普通用户默认没有sudo组,如果不设置root密码,则普通用户有sudo组,密码可以用settings文件的,也可以从shadow获取,也可以mkpasswd
# root密码
# root account and password
d-i passwd/root-login boolean true
# d-i passwd/root-password-crypted password $default_password_crypted 这个是/etc/cobbler/settings中设置的密码
d-i passwd/root-password-crypted password $6$TwMc7kHxAYSdICBU$yUVPcTo.SWi6FpWrZsx3.X.yjbrvqvgMxu0Jvqims55ZU6hQKPaR5DeQISwhcMBkmyVK/UJ1SFnpmu9E3S/Wu0

#设置普通用户及密码
# skip creation of a normal user account.
d-i passwd/make-user boolean true
d-i passwd/user-fullname string qqq
d-i passwd/username string qqq
d-i passwd/user-password-crypted password $6$TwMc7kHxAYSdICBU$yUVPcTo.SWi6FpWrZsx3.X.yjbrvqvgMxu0Jvqims55ZU6hQKPaR5DeQISwhcMBkmyVK/UJ1SFnpmu9E3S/Wu0
设置时区
# NTP/Time Setup
d-i time/zone string Asia/Shanghai
d-i clock-setup/utc boolean true
d-i clock-setup/ntp boolean true
d-i clock-setup/ntp-server  string ntp.aliyun.com
最终文件
d-i debian-installer/locale string en_US
d-i console-setup/ask_detect boolean false
d-i keyboard-configuration/xkb-keymap select us
d-i keyboard-configuration/toggle select No toggling
d-i keyboard-configuration/layoutcode string us
d-i keyboard-configuration/variantcode string
d-i netcfg/choose_interface select auto
d-i netcfg/get_hostname string $myhostname
d-i time/zone string Asia/Shanghai
d-i clock-setup/utc boolean true
d-i clock-setup/ntp boolean true
d-i clock-setup/ntp-server  string ntp.aliyun.com
d-i mirror/country string manual
d-i mirror/http/hostname string $http_server
d-i mirror/http/directory string $install_source_directory
d-i mirror/http/proxy string
d-i live-installer/net-image string http://$http_server/cobbler/links/$distro_name/install/filesystem.squashfs
d-i partman/choose_partition select finish
d-i partman/confirm boolean true
d-i partman/confirm_nooverwrite boolean true
d-i partman-auto/method string lvm
d-i partman-lvm/device_remove_lvm boolean true
d-i partman-lvm/confirm boolean true
d-i partman-lvm/confirm_nooverwrite boolean true
d-i partman-md/device_remove_md boolean true
d-i partman-partitioning/confirm_write_new_label boolean true
d-i partman-auto/choose_recipe select atomic
d-i passwd/root-login boolean true
d-i passwd/root-password-crypted password $6$TwMc7kHxAYSdICBU$yUVPcTo.SWi6FpWrZsx3.X.yjbrvqvgMxu0Jvqims55ZU6hQKPaR5DeQISwhcMBkmyVK/UJ1SFnpmu9E3S/Wu0
d-i passwd/make-user boolean true
d-i passwd/user-fullname string qqq
d-i passwd/username string qqq
d-i passwd/user-password-crypted password $6$TwMc7kHxAYSdICBU$yUVPcTo.SWi6FpWrZsx3.X.yjbrvqvgMxu0Jvqims55ZU6hQKPaR5DeQISwhcMBkmyVK/UJ1SFnpmu9E3S/Wu0
$SNIPPET('preseed_apt_repo_config')
tasksel tasksel/first multiselect standard
d-i grub-installer/grub2_instead_of_grub_legacy boolean true
d-i grub-installer/bootdev string default
d-i debian-installer/add-kernel-opts string $kernel_options_post
d-i finish-install/reboot_in_progress note
d-i preseed/early_command string wget -O- \
   http://$http_server/cblr/svc/op/script/$what/$name/?script=preseed_early_default | \
   /bin/sh -s
d-i preseed/late_command string wget -O- \
   http://$http_server/cblr/svc/op/script/$what/$name/?script=preseed_late_default | \
   chroot /target /bin/sh -s
8.2 sample.seed
与centos不同,ubuntu18.04用的不是ks文件通过cobbler profile report --name ubuntu18.04-mini-hwe-x86_64看到ubuntu使用的sample.seed文件
[root@node1 ~]# cobbler profile report --name ubuntu18.04-mini-x86_64
Name                           : ubuntu18.04-mini-x86_64
TFTP Boot Files                : {}
Comment                        :
DHCP Tag                       : default
Distribution                   : ubuntu18.04-mini-x86_64
Enable gPXE?                   : 0
Enable PXE Menu?               : 1
Fetchable Files                : {}
Kernel Options                 : {}
Kernel Options (Post Install)  : {}
Kickstart                      : /var/lib/cobbler/kickstarts/sample.seed
Kickstart Metadata             : {}
Management Classes             : []
Management Parameters          : <<inherit>>
Name Servers                   : []
Name Servers Search Path       : []
Owners                         : ['admin']
Parent Profile                 :
Internal proxy                 :
Red Hat Management Key         : <<inherit>>
Red Hat Management Server      : <<inherit>>
Repos                          : []
Server Override                : <<inherit>>
Template Files                 : {}
Virt Auto Boot                 : 1
Virt Bridge                    : xenbr0
Virt CPUs                      : 1
Virt Disk Driver Type          : raw
Virt File Size(GB)             : 5
Virt Path                      :
Virt RAM (MB)                  : 512
Virt Type                      : kvm
通过此文件的内容里面,找到了ubuntu18.04的相关文档:
https://help.ubuntu.com/18.04/installation-guide/
https://help.ubuntu.com/18.04/installation-guide/amd64/apb.html
https://www.debian.org/releases/stable/example-preseed.txt
https://help.ubuntu.com/18.04/installation-guide/example-preseed.txt
默认sample.seed文件内容
[root@node1 ~]# cat /var/lib/cobbler/kickstarts/sample.seed
# Mostly based on the Ubuntu installation guide
# https://help.ubuntu.com/18.04/installation-guide/
# Debian sample
# https://www.debian.org/releases/stable/example-preseed.txt

# Preseeding only locale sets language, country and locale.
d-i debian-installer/locale string en_US

# Keyboard selection.
# Disable automatic (interactive) keymap detection.
d-i console-setup/ask_detect boolean false
d-i keyboard-configuration/xkb-keymap select us
d-i keyboard-configuration/toggle select No toggling
d-i keyboard-configuration/layoutcode string us
d-i keyboard-configuration/variantcode string

# netcfg will choose an interface that has link if possible. This makes it
# skip displaying a list if there is more than one interface.
#set $myhostname = $getVar('hostname',$getVar('name','cobbler')).replace("_","-")
d-i netcfg/choose_interface select auto
d-i netcfg/get_hostname string $myhostname

# If non-free firmware is needed for the network or other hardware, you can
# configure the installer to always try to load it, without prompting. Or
# change to false to disable asking.
# d-i hw-detect/load_firmware boolean true

# NTP/Time Setup
d-i time/zone string US/Eastern
d-i clock-setup/utc boolean true
d-i clock-setup/ntp boolean true
d-i clock-setup/ntp-server  string ntp.ubuntu.com

# Setup the installation source
d-i mirror/country string manual
d-i mirror/http/hostname string $http_server
d-i mirror/http/directory string $install_source_directory
d-i mirror/http/proxy string

#set $os_v = $getVar('os_version','')
#if $breed == "ubuntu" and $os_v and $os_v.lower() != 'precise'
# Required at least for ubuntu 12.10+ , so test os_v is not precise. Olders versions are not supported anymore
d-i live-installer/net-image string http://$http_server/cobbler/links/$distro_name/install/filesystem.squashfs
#end if

# Suite to install.
# d-i mirror/suite string precise
# d-i mirror/udeb/suite string precise

# Components to use for loading installer components (optional).
#d-i mirror/udeb/components multiselect main, restricted

# Disk Partitioning
# Use LVM, and wipe out anything that already exists
d-i partman/choose_partition select finish
d-i partman/confirm boolean true
d-i partman/confirm_nooverwrite boolean true
d-i partman-auto/method string lvm
d-i partman-lvm/device_remove_lvm boolean true
d-i partman-lvm/confirm boolean true
d-i partman-lvm/confirm_nooverwrite boolean true
d-i partman-md/device_remove_md boolean true
d-i partman-partitioning/confirm_write_new_label boolean true

# You can choose one of the three predefined partitioning recipes:
# - atomic: all files in one partition
# - home:   separate /home partition
# - multi:  separate /home, /usr, /var, and /tmp partitions
d-i partman-auto/choose_recipe select atomic

# If you just want to change the default filesystem from ext3 to something
# else, you can do that without providing a full recipe.
# d-i partman/default_filesystem string ext4

# root account and password
d-i passwd/root-login boolean true
d-i passwd/root-password-crypted password $default_password_crypted

# skip creation of a normal user account.
d-i passwd/make-user boolean false

# You can choose to install restricted and universe software, or to install
# software from the backports repository.
# d-i apt-setup/restricted boolean true
# d-i apt-setup/universe boolean true
# d-i apt-setup/backports boolean true

# Uncomment this if you don't want to use a network mirror.
# d-i apt-setup/use_mirror boolean false

# Select which update services to use; define the mirrors to be used.
# Values shown below are the normal defaults.
# d-i apt-setup/services-select multiselect security
# d-i apt-setup/security_host string security.ubuntu.com
# d-i apt-setup/security_path string /ubuntu

$SNIPPET('preseed_apt_repo_config')

# Enable deb-src lines
# d-i apt-setup/local0/source boolean true

# URL to the public key of the local repository; you must provide a key or
# apt will complain about the unauthenticated repository and so the
# sources.list line will be left commented out
# d-i apt-setup/local0/key string http://local.server/key

# By default the installer requires that repositories be authenticated
# using a known gpg key. This setting can be used to disable that
# authentication. Warning: Insecure, not recommended.
# d-i debian-installer/allow_unauthenticated boolean true

# Package selection
# Default for minimal
tasksel tasksel/first multiselect standard
# Default for server
# tasksel tasksel/first multiselect standard, web-server
# Default for gnome-desktop
# tasksel tasksel/first multiselect standard, gnome-desktop

# Individual additional packages to install
# wget is REQUIRED otherwise quite a few things won't work
# later in the build (like late-command scripts)
d-i pkgsel/include string ntp ssh wget

# Debian needs this for the installer to avoid any question for grub
# Please verify that it suit your needs as it may overwrite any usb stick
#if $breed == "debian"
d-i grub-installer/grub2_instead_of_grub_legacy boolean true
d-i grub-installer/bootdev string default
#end if

# Use the following option to add additional boot parameters for the
# installed system (if supported by the bootloader installer).
# Note: options passed to the installer will be added automatically.
d-i debian-installer/add-kernel-opts string $kernel_options_post

# Avoid that last message about the install being complete.
d-i finish-install/reboot_in_progress note

## Figure out if we're kickstarting a system or a profile
#if $getVar('system_name','') != ''
#set $what = "system"
#else
#set $what = "profile"
#end if

# This first command is run as early as possible, just after preseeding is read.
# d-i preseed/early_command string [command]
d-i preseed/early_command string wget -O- \
   http://$http_server/cblr/svc/op/script/$what/$name/?script=preseed_early_default | \
   /bin/sh -s

# This command is run immediately before the partitioner starts. It may be
# useful to apply dynamic partitioner preseeding that depends on the state
# of the disks (which may not be visible when preseed/early_command runs).
# d-i partman/early_command \
#       string debconf-set partman-auto/disk "\$(list-devices disk | head -n1)"

# This command is run just before the install finishes, but when there is
# still a usable /target directory. You can chroot to /target and use it
# directly, or use the apt-install and in-target commands to easily install
# packages and run commands in the target system.
# d-i preseed/late_command string [command]
d-i preseed/late_command string wget -O- \
   http://$http_server/cblr/svc/op/script/$what/$name/?script=preseed_late_default | \
   chroot /target /bin/sh -s
修改后的sample.seed
# 太难调了,上面那个凑活能用,装完后手动优化吧
九、cobbler安装windows
参考:https://juejin.im/post/5c748b2af265da2d9262ed0f
暂时不操作了。WDS暂时也能用。